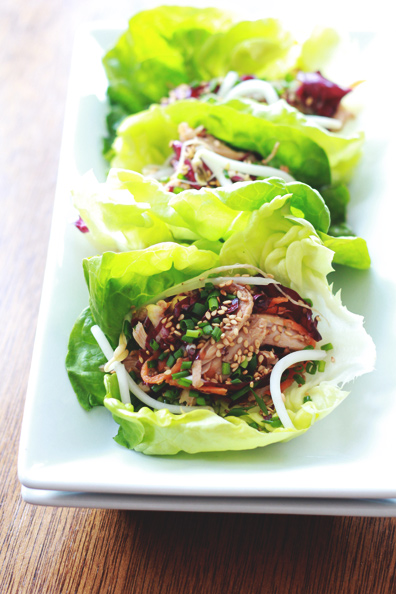
Think of this as the healthier sister to the P.F. Chang’s version that everyone loves. Yes, there are a gazillion copycat recipes of this app floating around, but my take is a little different and still full of plenty of flavor. The best part is how easy it is–the perfect kind of dish to serve up at a party and let your guests help themselves. Most recipes call for ground chicken, which happens to include dark meat. Instead, cook a few chicken breasts to shred so you get the lean, white meat only. Shredded carrots and radicchio are an easy way to sneak in some extra nutrients and balance each other out (sweet and bitter). The dressing is where it’s all at, though. Dijon mustard and minced ginger pack a lot of flavor, and using light soy sauce cuts out some of the extra salt. To serve, Boston or Bibb lettuce leaves work best as they’re naturally curled into the perfect-sized cups. Set out fresh bean sprouts for a low-cal crunchy topping, as well as chopped chives and toasted sesame seeds.
Asian Chicken Lettuce Wraps
For the dressing:
1/4 cup low-sodium soy sauce
1 1/2 tablespoons rice wine vinegar
1 tablespoon Dijon mustard
1 tablespoon minced ginger
1 teaspoon crushed red pepper flakes
1 1/2 tablespoons vegetable oil
1 tablespoon toasted sesame oil
For the filling:
4 cups shredded cooked chicken
2 small radicchio, shredded
2 carrots, shredded with a box grater
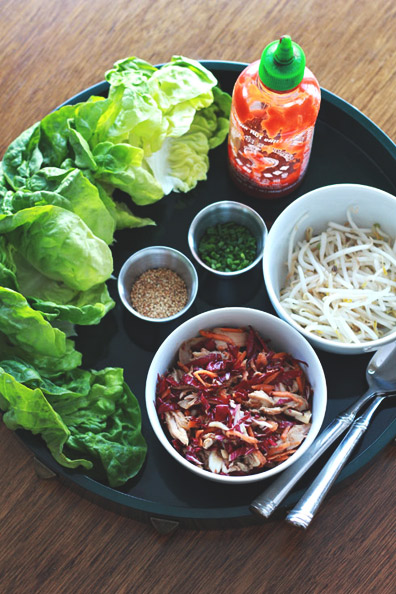
For serving:
Bibb or Boston lettuce leaves
Fresh bean sprouts, toasted sesame seeds, and chopped chives for garnish
Sriracha for added heat
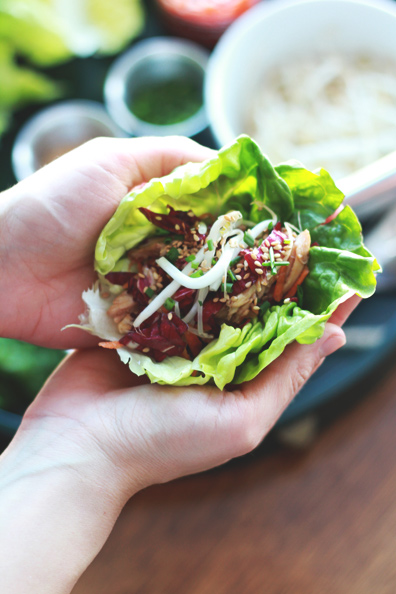
In a small bowl, combine first five ingredients. Whisk in the vegetable and sesame oil. In a large bowl, mix shredded chicken, radicchio and carrot. Add the dressing slowly, tossing to combine. You may not need all of it. To serve, spoon chicken mixture into the lettuce leaves. Top with bean sprouts, chives and toasted sesame seeds.
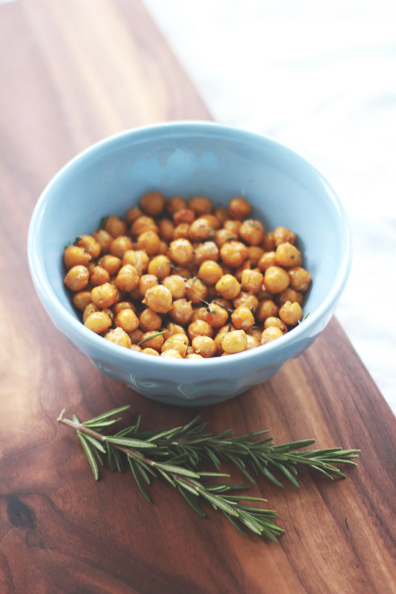
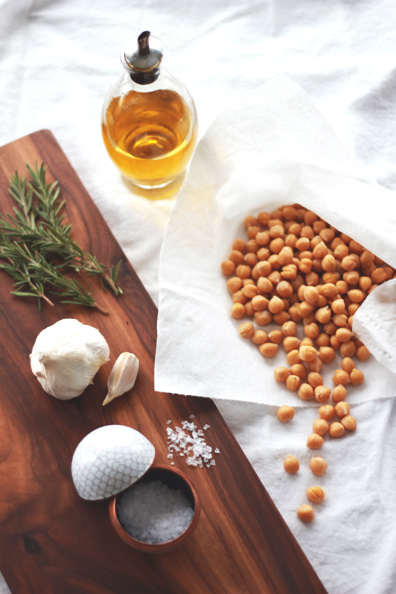
Last weekend we grabbed dinner at one of our favorite spots in town for a low-key date night, Brasserie V. We’re addicted to their moules et frites, but recently we’ve been craving their bistro salad and burger, which we like to split. We usually don’t even look at the menu, but we did this time just to double check we didn’t want to branch out. In doing so I noticed a new appetizer on the menu that had me totally intrigued. Crispy chickpeas? With rosemary, sea salt and SarVecchio? We didn’t order them, but I decided they sounded simple enough to give them a whirl at home. Well, I’m kind of hooked. These little guys are going to be our new snack of choice, I can tell. And they’re kind of perfect at the end of a long week (or day) with a Belgian beer or glass of crisp, white wine. I could go on about their crispy deliciousness, but let’s get right on to the recipe!
Crispy Rosemary Chickpeas
1 can chickpeas, drained and rinsed
Olive oil
1 clove of garlic, minced
1-2 sprigs of fresh rosemary, chopped fine
Maldon sea salt
SarVecchio
Preheat oven to 425 degrees. Place chickpeas on a paper towel and place another paper towel on top. Leave them there for about 10 minutes—the paper towels will soak up the moisture for you. Add chickpeas to a bowl, drizzle with enough olive oil to coat them well, but no need to overdo it. Season with sea salt, garlic and rosemary. I didn’t measure the salt and rosemary—just eyeball it so there’s a nice amount of seasoning to go around and impart some flavor. You can play around with the seasonings used too—smoked paprika and cayenne pepper, cumin and curry, etc. Spread chickpeas onto a baking sheet and bake for 15 minutes; toss then bake another 15 minutes. Transfer crispy chickpeas to a bowl and top with a little additional chopped rosemary and a couple grates (using a microplane) of SarVecchio.
Today I have a real treat for you: I’m so excited to welcome a new contributor to Perpetually Chic,Elizabeth Ansfield! I got to know Elizabeth at work, but we quickly realized we would become dear friends. We’ve since bonded over a mutual love of great food and personal style, and a shared passion for putting pen to paper. A few months ago it dawned on me that while I love to cook and share recipes, I rarely bake—even though I love dessert. Elizabeth bakes all the time. Enter our new “One Last Bite” series, a nod to those of us who just cannot resist temptation when it comes to sweets. Elizabeth will be dropping by once a month with her quick wit and favorite, decadent dessert recipes. So please welcome Elizabeth, and let’s kick things off…
Elizabeth here with your first installment of One Last Bite. I’m going to be honest with you: the desserts I make are not for the weak of heart. My recipes will not likely please your nutritionist, lower your cholesterol, or help you get into those size 2 jeans you bought with your fingers crossed last summer. But I assure you that the recipes I share with you will cause you and your loved ones to make funny noises with every bite.
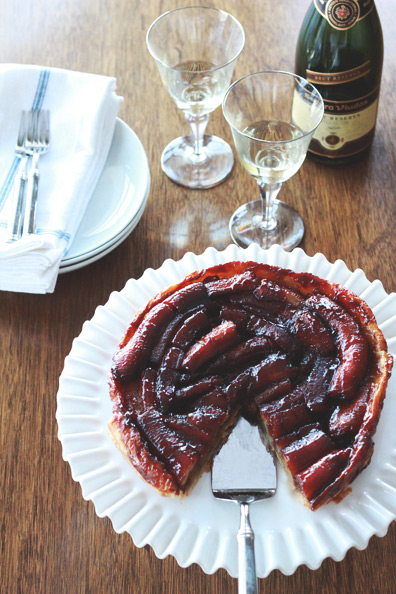
You can take comfort in the fact this recipe contains 5 entire servings of fruit (bathed in gooey caramel and nestled in a bed of flaky butter pastry). I made this Butterscotch Banana Tarte Tatin as a Valentine’s treat for the banana-lover in my life, my soon-to-be-husband. His compliments on my baking usually end with a caveat: “It’s so delicious, baby. But it would be even better if there were bananas in it.” I finally listened—and he responded by making funny noises until his plate was clean.
Butterscotch Banana Tarte Tatin
All-purpose flour, for work surface
1 sheet frozen puff-pastry dough, thawed in the refrigerator for 1 day
3 tablespoons unsalted butter
1/2 cup packed dark-brown sugar
1/2 teaspoon sea salt flakes
5 large ripe (but not speckled) bananas, peeled, halved lengthwise
1 teaspoon vanilla extract
2 tbsp bourbon or Scotch (optional)
Recommended additions: 1/8 teaspoon cinnamon or nutmeg
Vanilla ice cream, for serving
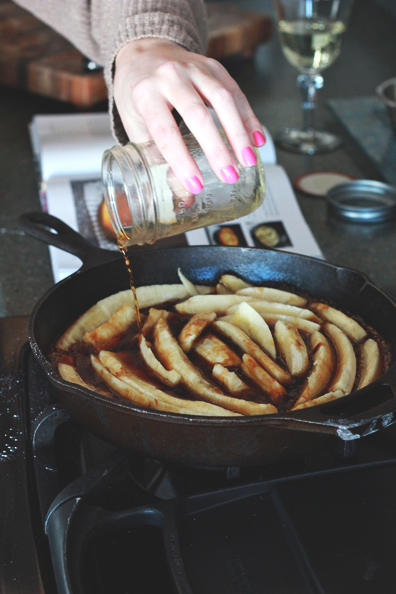
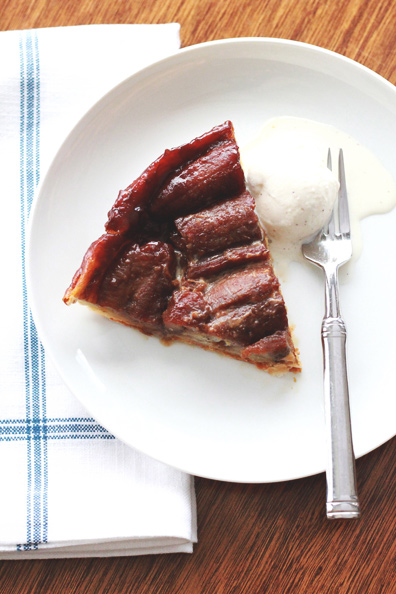
For this recipe, you’ll need a 9-inch skillet heavy enough so you fear dropping it on your toes. I only had a 10-inch skillet, and it worked beautifully. Preheat your oven to 400°F (200°C). Roll out your puff pastry on a floured surface to a 9- [or 10-] inch circle, and trim if necessary. Place the pastry between two pieces of wax paper and transfer to the fridge until needed. Melt the butter in the skillet over medium-high heat. Stir in the sugar, salt, and cinnamon or nutmeg (if using). Cook, stirring frequently to make sure the sugar doesn’t burn, until the mixture turns medium amber, about 3 minutes. Arrange the bananas in the skillet, overlapping them slightly. Cook, without stirring, for 3 minutes. Drizzle the vanilla and the alcohol of your choice (if using) over the bananas, and cook until most of the liquor has evaporated and the liquid has thickened, about 1-2 minutes. Remove the bananas from heat. Place the pastry round on top of the bananas, and transfer it to the oven. Bake until the pastry is golden brown and puffed, about 25 minutes. Remove the tarte from the oven, and carefully invert the tart onto a serving plate. Don’t even think about serving this without vanilla ice cream.
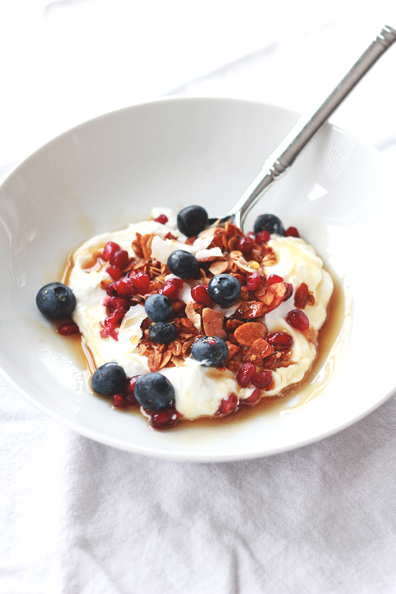
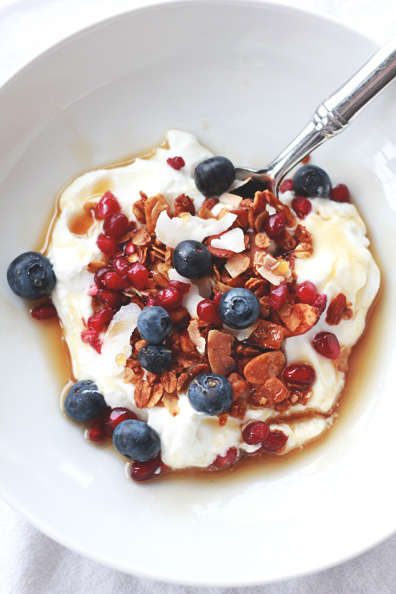
Did anyone make healthy eating resolutions this year? We already ate quite healthy, but we’ve been pushing ourselves a bit further this year–avoiding the middle aisles at the supermarket almost completely and nixing most packaged foods like cereal and crackers. It’s actually way easier than I thought it would be, and you can really taste the difference when you make certain things yourself–like this hummus or the granola in this yogurt bowl. Variations of this yogurt bowl or steel-cut oats with similar toppings have been the go-to breakfasts in our home. I made the granola yesterday and shot my yogurt this morning right before eating–it’s such a treat to start the day! The great thing is you can top it in so many ways, though I can’t get enough toasted coconut flakes and pomegranate seeds right now. I’m also loving a drizzle of maple syrup instead of honey…it runs to the sides of the bowl and is easier to mix into bites in my opinion. What are your favorite healthy breakfasts? I probably need to branch out soon!
Granola & Fruit Yogurt Bowl
Greek yogurt (I like Fage 0%) Homemade granola Coconut flakes, toasted
Pomegranate seeds
Blueberries
Maple syrup
Make a batch of granola and store in an air-tight container. I used this recipe, but substituted hemp seeds for the sesame seeds and used walnuts and sliced almonds. Scoop yogurt into a bowl, then top with homemade granola, toasted coconut flakes, pomegranate seeds, and blueberries. Drizzle with maple syrup (or honey if you prefer).
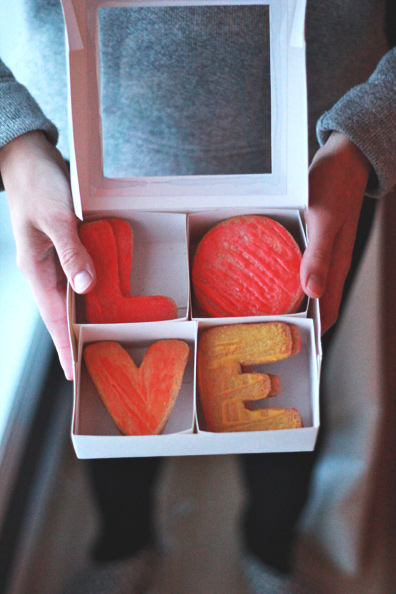
Happy Valentine’s Day! I love this month since it’s all about sweet treats & little love notes, celebrating our significant others and also our girlfriends. This year I was inspired to use my mom’s sugar cookie recipe to create something to gift to friends. Inspired by Jen’sLOVE prints and colorful paintings, these painted LOVE cookies send a sweet message to their lucky recipients. My favorite part of these sugar cookies is the lemon…the lemon rind and juice add a subtle citrus flavor that really kicks them up a notch. I ordered this set of alphabet cookie cutters to create my L-O-V-E. Another fun option would be to use X-O-X-O. The final touch: See-through boxes that ensure your painted cookies are perfectly packed for gifting to loved ones at Valentine’s Day.
Love Sugar Cookies Makes about 3 dozen
1 cup butter, softened
1 3/4 cups powdered sugar, sifted
1 egg
2 teaspoons vanilla extract
Finely grated rind of 1 lemon
2 tablespoons lemon juice
2 1/2 cups all-purpose flour
1 teaspoon baking soda
1/4 teaspoon salt
For the icing:
1 cup powdered sugar
1 tablespoon heavy whipping cream
Food coloring
Paintbrush
Cream butter and powdered sugar until light and fluffy. Beat in egg, vanilla, lemon rind, then lemon juice. Add flour, soda and salt; mix until blended. Divide dough; wrap each half in plastic wrap and pat into a disc. Refrigerate several hours until firm. On a floured surface, roll one disc about 1/4 inch thick. Cut with letter-shaped cutters (ex. LOVE or XOXO). Transfer to a lightly greased cookie sheet and bake in a pre-heated 325-degree oven for 12-15 minutes, until barely browned. Cool on wire racks and repeat with remaining dough. To decorate, stir 1 tablespoon of cream into 1 cup of powdered sugar. Divide among small bowls and use food coloring to make intense shades. Use a clean paint brush to paint the cookies with the icing, adding a little extra cream into the icing if needed to make it thinner. Wipe the paintbrush off in between, or even let a little color remain on the brush to overlap shades. Go back over each cookie with extra brush strokes. Make sure you let the icing fully dry on each cookie, then stack into boxes.
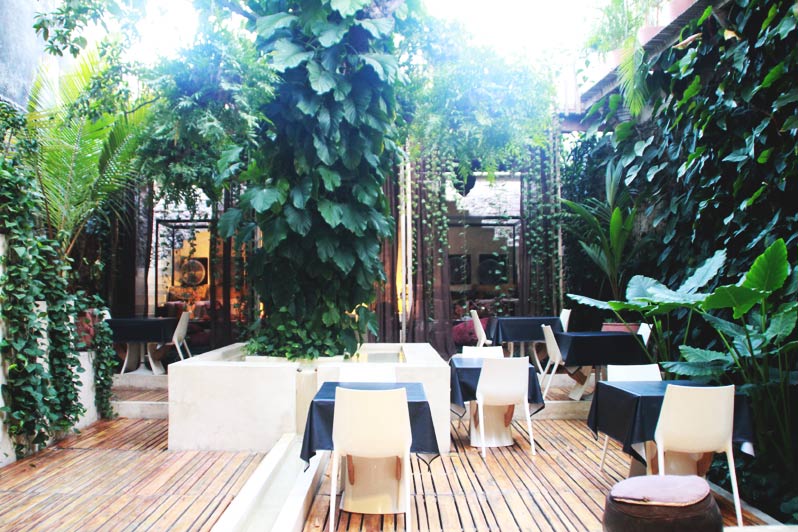
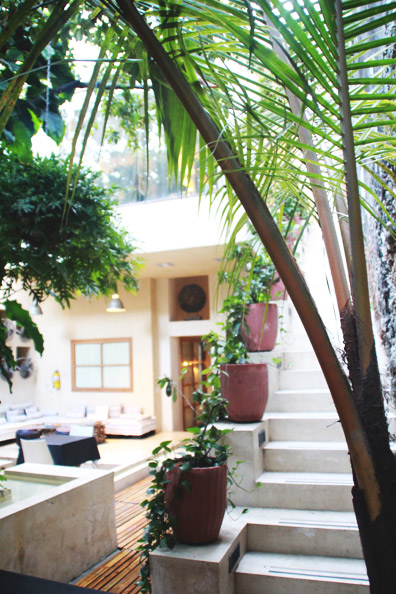
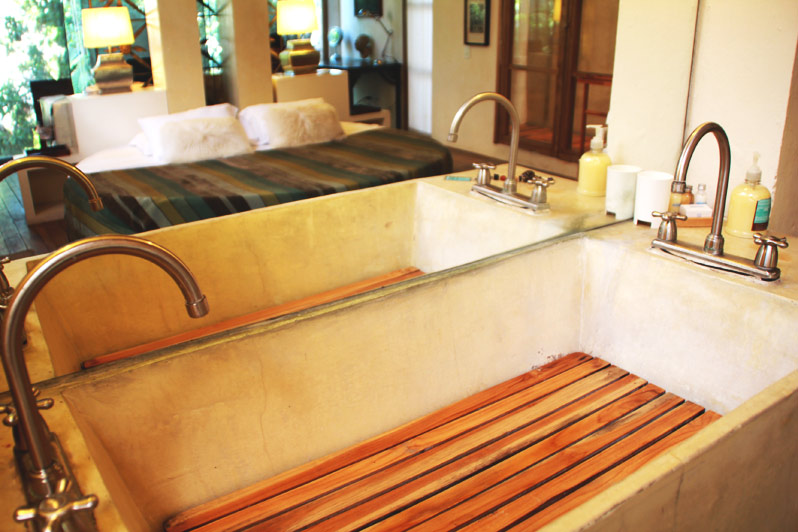
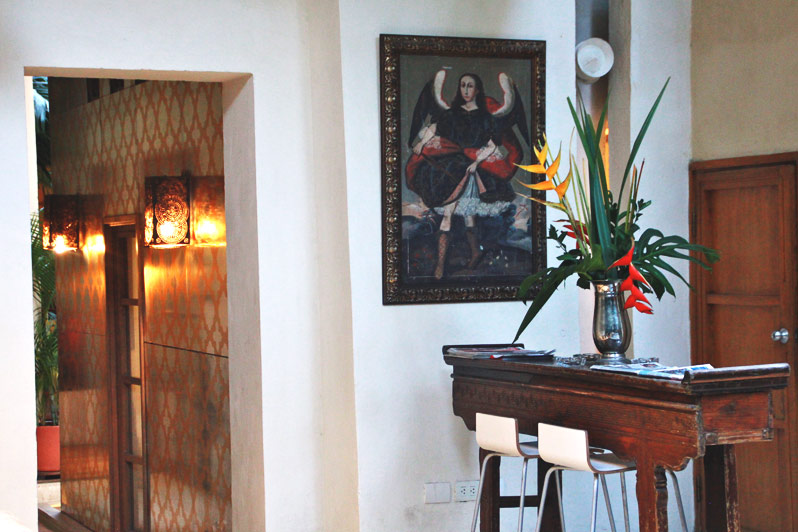
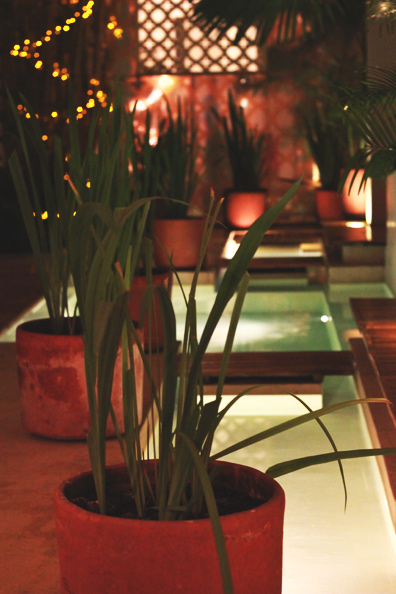
Have you ever been in a hotel, an acquaintance’s home, or even just seen a house in a magazine that you fell head over heels in love with? As in really, really in love– the I-want-to-move-in-and-never-leave kind of love? Well I thought Amanda Peet’s home was my ultimate home crush…until I walked into our hotel in Cartagena. Casa Lola is effortless luxury. It has that perfect bit of edge, that bohemian flair mixed with a global vibe that is exactly my style. No question I was taking notes, and now today I’m going to give you a little tour of Cartagena’s best-kept secret…
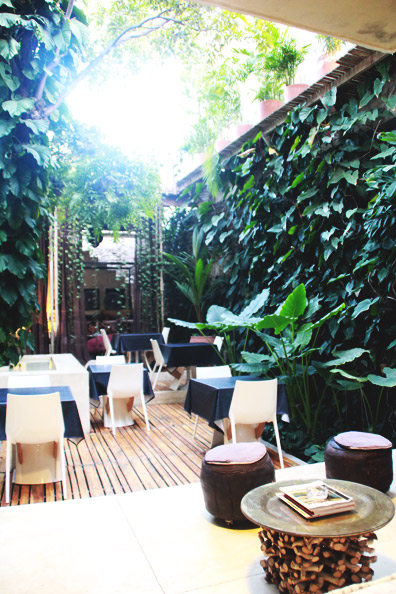
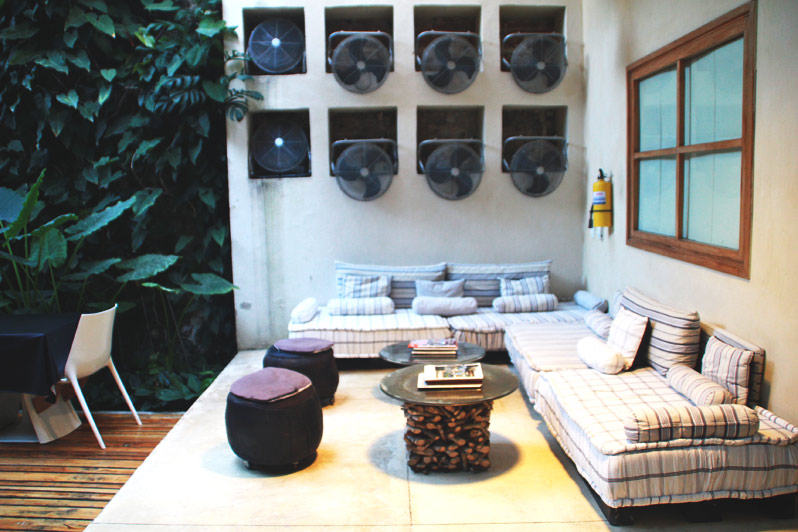
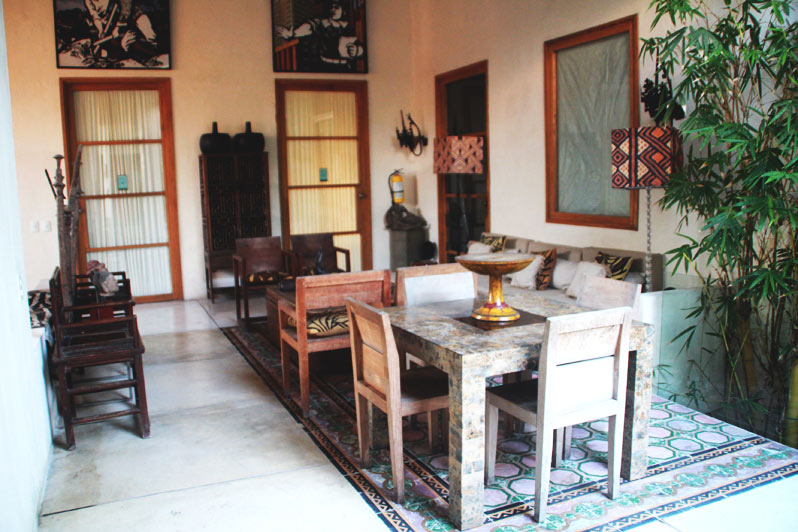
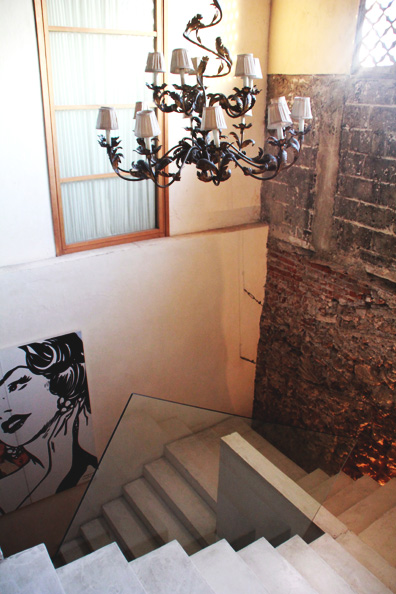
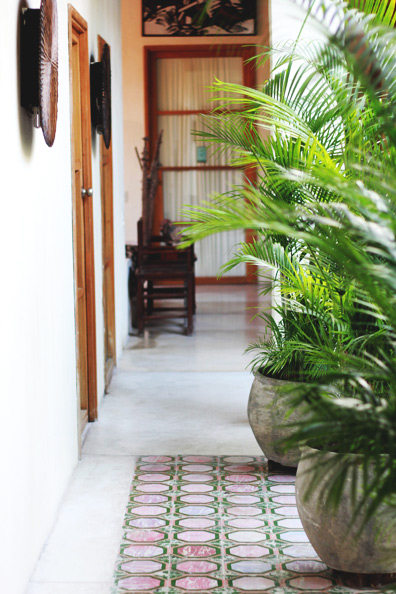
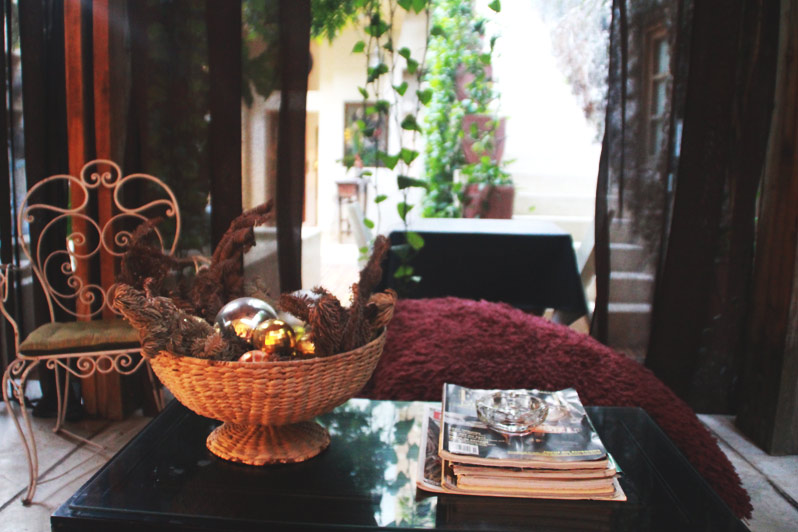
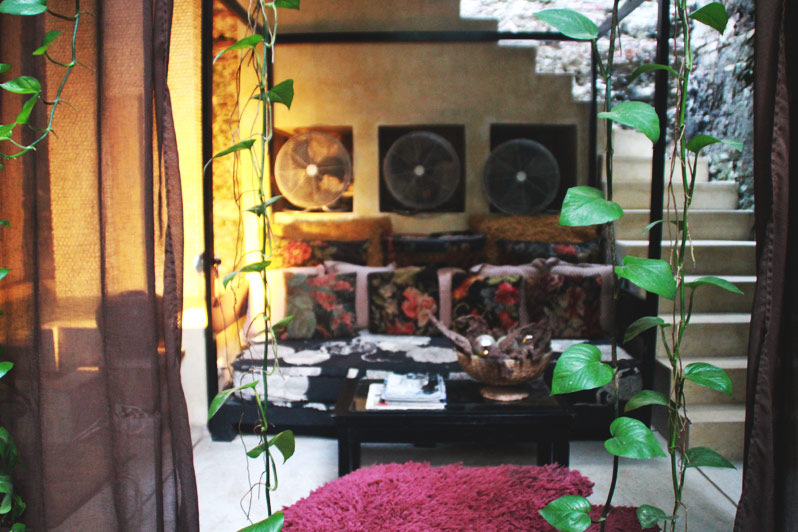
A central walkway through the hotel, with mirrored walls, leads to the most romantic garden. Light filters through the lush palms and vines that cascade to its slatted-wood deck. A few modern tables host breakfast in the morning, and two boho-chic daybeds await leisurely lounging and reading. And a staircase leads up to a rooftop pool with an amazing view of the city.
I found Casa Lola via Kiwi Collection, one of my go-to sites for discovering unique hotels when planning our trips. There was another hotel I had my eye on that wasn’t available (we went during high season), but in flipping through the other options I was happy to find Casa Lola and feel lucky to have snapped up a room right away.
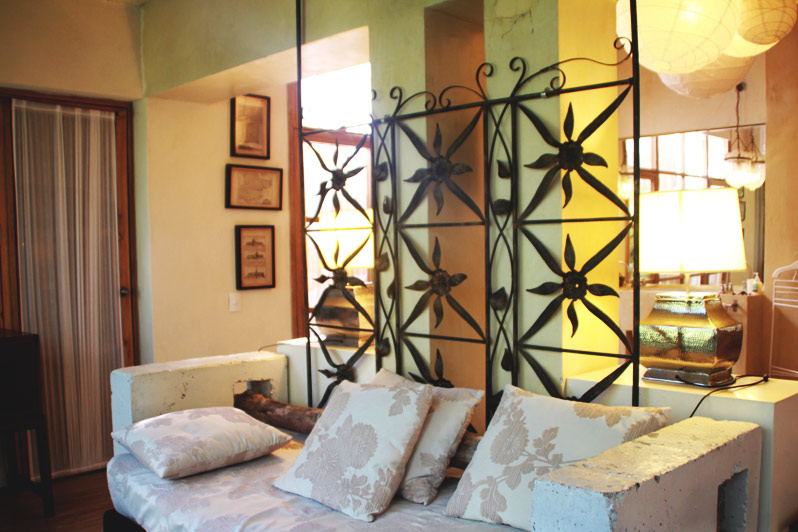
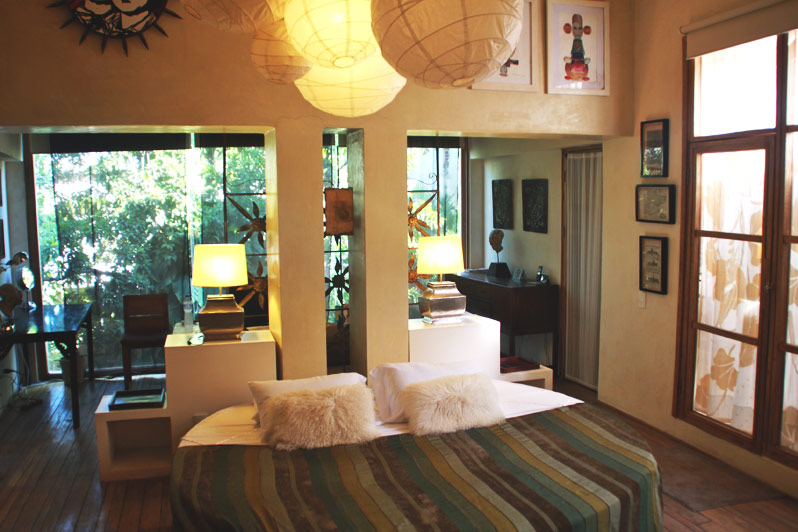
Located in the up-and-coming Getsemani neighborhood, Casa Lola is decorated just the way I like it, a careful curation of antiques, eclectic objets d’art, and textures, with stacks of magazines and books on every coffee table just waiting to be read. It’s at once both an interesting and a comfortable place to be in.We had the good fortune of enjoying the very best room in the 10-room hotel–a stunning suite flooded in light with floor-to-ceiling windows overlooking the garden and a private entrance onto the stairs that led up to the rooftop pool.
Really, I could’ve just stayed in our room, but the rest of the hotel’s spaces were too good to not enjoy as well…particularly those daybeds. I need one of those in my next house for sure! Of course, not to be missed for cooling off during the blazing hot days or for sipping cocktails while watching the sunset, the rooftop pool…So. If you ever get a chance to head to Cartagena, don’t forget about this little secret hideaway called Casa Lola. And don’t be surprised if one day my future house looks just like this!