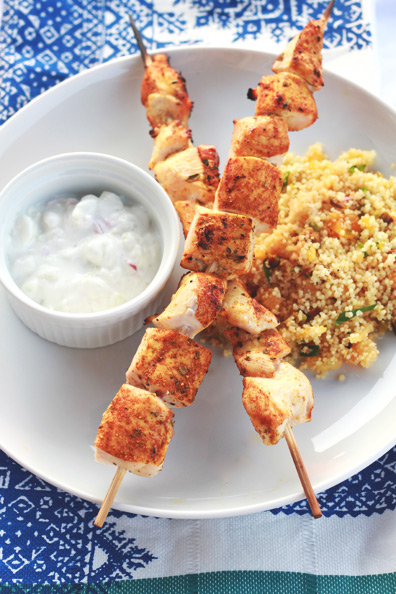
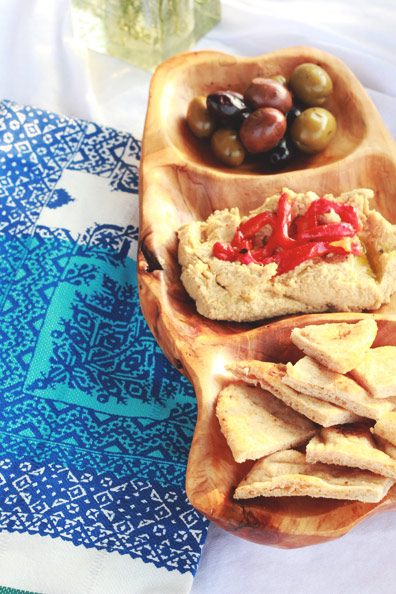
Recently, we’ve become creatures of habit. We make a Mediterranean-inspired feast once a week and never tire of it. Perfect for a quick summer meal, chicken rubbed with a blend of Middle Eastern spices is balanced with a creamy, tangy yogurt sauce. I like to serve the kabobs with grilled flatbread, homemade hummus, a simple salad of cucumber, tomato, red onion and feta dressed with red wine vinegar and oregano, and apricot-mint couscous. It truly is a feast, and we always have leftovers, but you’d be surprised how much we consume. It’s a favorite meal in our home for sure, and one where all the recipes have been born from our own experimentation in the kitchen. Keep reading for the details!
In a small bowl, mix together all spices to create the rub. Rub can be made ahead and stored in an airtight container. Rub each chicken breast generously, on both sides, with the spice blend. Transfer to a cutting board and cut into cubes, then thread onto pre-soaked skewers. Cook on a grill, flipping once.
Cucumber Yogurt Sauce
1 cup Greek yogurt
1/2 teaspoon lemon juice
1/2 teaspoon red wine vinegar
1/2 cucumber, peeled and finely diced
1 shallot, minced
1/4 teaspoon garlic powder
Salt and pepper to taste
In a bowl, whisk together the yogurt, lemon juice and red wine vinegar. Fold in the cucumber and shallot, then season with salt and pepper to taste.
Apricot-Mint Couscous
3/4 cup couscous
1 cup water or chicken stock
1 clove garlic, minced
1 small shallot, minced
1/2 cup dried apricots, chopped
1/2 cup roasted pistachios, chopped
Juice of half a lemon
Olive oil
1/4 cup of flat-leaf parsley, chopped
1/4 cup of fresh mint, chopped
Salt and pepper to taste
Bring water to a boil in a small saucepan. While you wait for the water to boil, lightly brown the couscous in a separate saute pan over medium-high heat. Toss constantly, about 5 minutes. Transfer couscous to the pot of boiling water, season with salt, remove from the heat and cover. Let stand about 5-7 minutes, then fluff with a fork. While couscous is cooking, saute the garlic and shallot in the saute pan until just browned. Set aside. Once couscous is ready (all the water has absorbed), fold in the garlic and shallot, apricots, and pistachios. Squeeze in the lemon juice and drizzle with a small amount of olive oil to re-introduce moisture to the couscous. Fold in the parsley and mint. Season with salt and pepper.
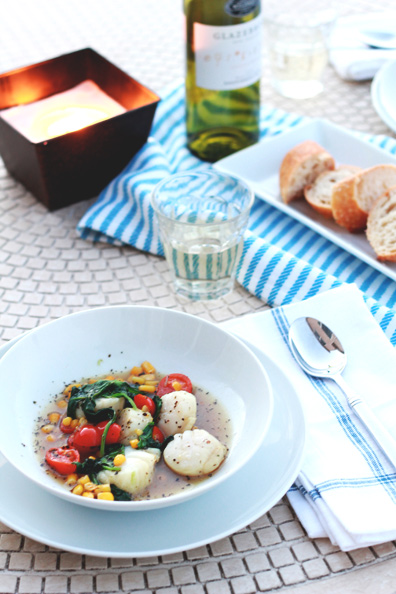
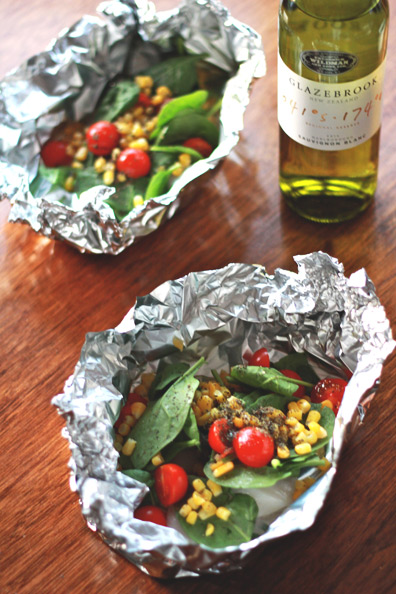
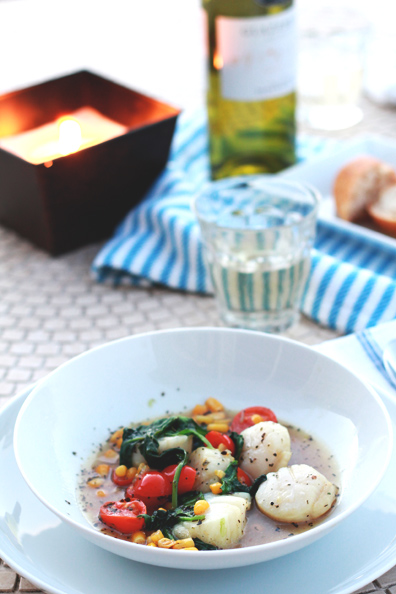
Come summer, there’s nothing I enjoy more than grilling dinner and watching the sun set on our patio with John. Perhaps the best thing about grilled summer meals is how easily they come together, leaving you more time to enjoy the weather and good company. I started making this scallop recipe back in grad school on a tiny camping grill on my tiny deck, and years later it’s the first meal I crave as soon as warm evenings set in. We made it last night and discussed a few potential future adjustments (searing the scallops, making more broth on the stove for soaking our French bread), but even at its simplest, steamed in foil packets, it’s a longtime favorite.
Scallops Steamed in Foil
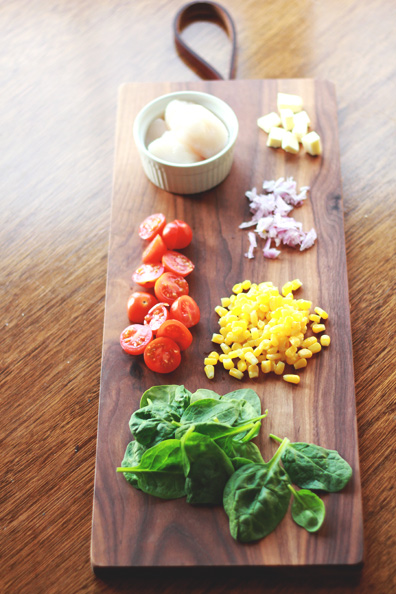
10 sea scallops 2 handfuls of baby spinach 1 cup of frozen corn, thawed 2 handfuls of cherry tomatoes, halved 1 small shallot, thinly sliced 1/3 cup basil, chopped into thin strips 6 tablespoons of dry white wine (I always use a New Zealand Sauvignon Blanc) 2 tablespoons of olive oil 1 tablespoon of unsalted butter, chopped into small pieces Salt and pepper
Light a grill to medium-high heat. Cut two pieces of heavy aluminum foil, crease all four sides to form an open pouch. In the center of each foil packet, add 3 tablespoons of wine, 1 tablespoon olive oil, half the butter pieces and 1/2 the sliced shallot. Top with the scallops, spinach, tomatoes, corn and basil. Season with salt and pepper. Bring the sides of the foil pouch up to meet and fold to enclose. Grill the foil pouches until the steam inflates them and you can hear the juices boiling, exactly 10 minutes. Do not leave on longer than 10 minutes or the scallops will over cook. Remove the packets from the grill. Carefully open the packets to let the steam escape. Carefully transfer the entire ingredients from the foil packets into shallow soup bowls and serve immediately with French bread.
I often get asked how I style my hair (in fact, even just yesterday!). While I’m always super flattered by the compliment inherent in this question, I have to laugh because my response is always the same – oh, it’s actually just dirty! And 100 percent of the time that hair style also took me zero effort. I’ll be the first to admit it took me years to get here—years of straightening my naturally wavy hair, years of trying products that just didn’t synch up with my hair type, and even a few years of using too much hairspray and dry shampoo for ‘dos that were way more primping than my casual everyday style. It wasn’t until more recently that I realized that those perfect mermaid, bedhead waves I (and everyone else) was pinning left and right on Pinterest? I have that hair. So why am I messing with this very desirable, covetable thing?
The problem was embracing my natural hair while figuring out how to make it look its best—and all with as little effort as possible. Let’s be honest: I would much rather get some extra shut eye in the morning–or drag myself out of bed to pre-sunrise yoga–than spend time fussing with my hair. Spending hours in the bathroom getting ready is just not my style. So today I thought I’d share two haircare tips and four products I’ve recently adopted to fit both my style and hair type.
Secret #1: Wash Your Hair Less
All self-deprecating humor aside, the “dirty hair” response when people inquire about my locks is totally true. My number one hair tip is to stop washing your hair. Over time, I’ve learned my hair is not at its best freshly washed and styled, but rather the next day or the day after—or in the case of my ballerina buns, several days dirty is preferable. So I only wash it once a week. I’ll either air dry or blow dry, then do as little as possible with my hair the rest of the week. As the oils return to my hair after washing, it just looks better. My scalp doesn’t start to get greasy until I’m almost through the full week, and then at that point I eek out another day or two by employing a ponytail, high bun, or low chignon.
Secret #2: Find the Right Product, Then Leave Your Hair Alone
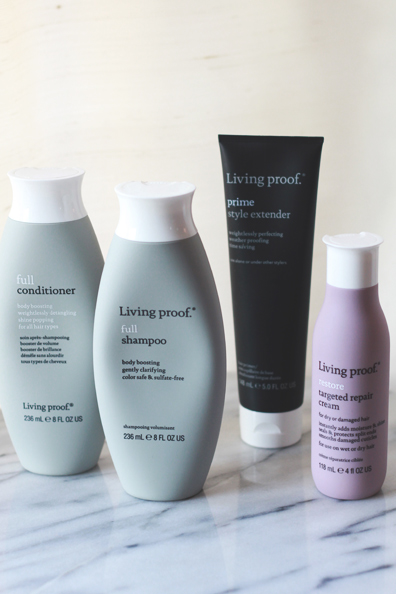
My second hair revolution was finding the right product for my hair type, then just letting it do its thing. I spent years and years trying different products and techniques, but nothing seemed to keep my naturally wavy locks free of dreaded frizz and dryness. That is until I found Living Proof a few months ago. After one wash and style I was hooked. My hair has transformed into the frizz-free, bouncy, super-soft, wavy locks I previously could never quite achieve. So here’s my Living Proof routine:
Full Shampoo & Conditioner – The longer my hair gets, the heavier it gets. I wash with this sulfate-free shampoo and conditioner, which cleans away buildup and hydrates my hair without weighing it down.
Prime Style Extender – Like a makeup primer, this extends the life of your style (and smooths strands as well). I start with a dollop of this, working it in starting a few inches down from my roots through to the ends. If I’m going to blow dry, I do that next.
Restore Targeted Repair Cream – You can use this moisture-imparting cream, which smooths as well as adds shine and repairs split ends, on wet or dry hair. So I use a very small amount after blow drying and on air-dry days, just after the primer.
It’s safe to say these four products have produced life-changing results for my hair woes. At the same time, they’ve simplified by hair care immensely and eliminated the need for a lot of other products—a hair brush, dry shampoo, moisture masks, straightening and curling products–I don’t need any of that anymore. I literally wake up and do nothing to my hair for days, which is really quite liberating (not to mention time saving). I may spritz on a little Bumble & Bumble Surf Spray if it’s feeling flat a couple days in, but that’s it.
So now that I’ve shared my haircare routine and secrets, what are yours? Any products you just can’t live without? Anyone else an infrequent hair washer?
Anyone else jump for joy with the first blooms of spring every year? No matter where you live, or how long your winter is, it seems like spring can never come quickly enough. I find myself leaning on way more neutral and dark staples in the winter than I’d care to admit, so the first chance to start breaking out colorful prints and pretty pastels is always welcome. We had fun with my father-in-law in town over the weekend and put his photographic genius to work, and today I’m debuting a new look for my style sessions!
I love mixing prints and textures, like this vibrant floral tank dress with my current favorite fringe cardigan. The great thing about a little floral number like this is how versatile it can be–you can easily throw on a navy blazer and pair of neutral pumps for a more business-appropriate work look. These studded sandals are another current go-to of mine, elevating casual weekend looks for brunches and dinners. But since they are flat and can make your legs look shorter, I make sure to balance them with thigh-grazing hemlines or skinny jeans.
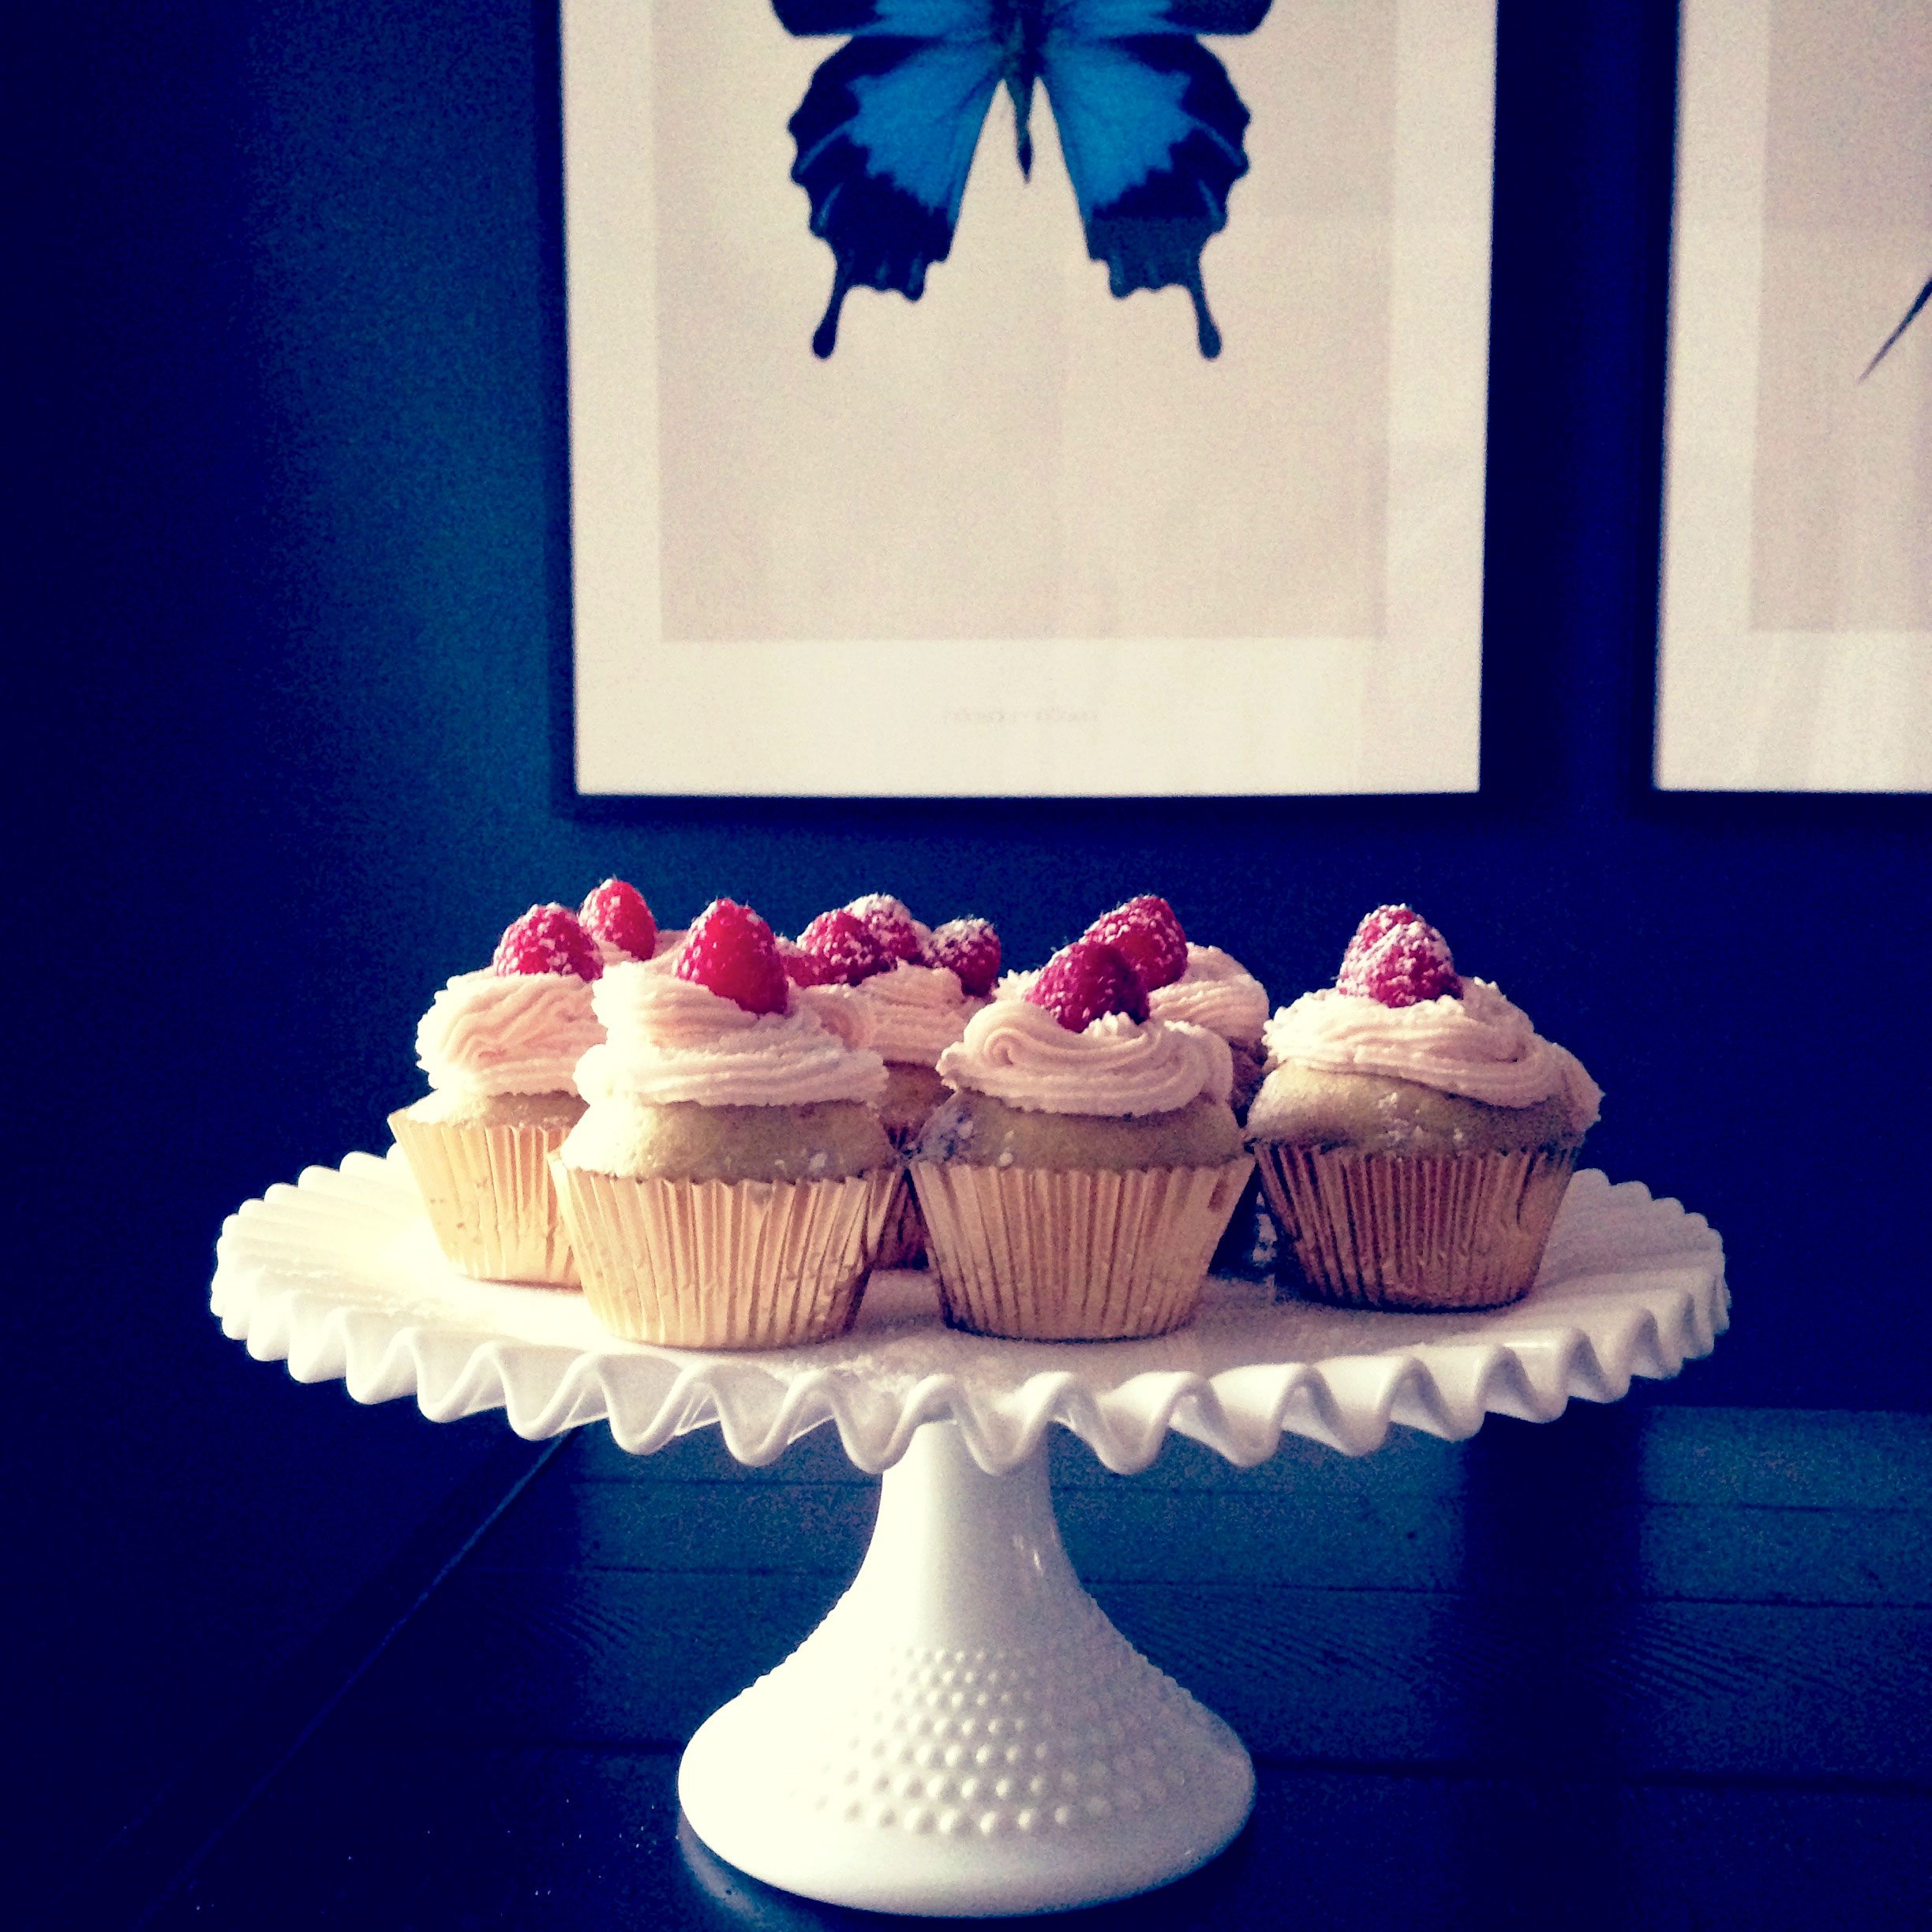
I didn’t plan to post these cupcakes on the blog (hence the Instagram photo). But since several of you asked for the recipe after I posted this quick pic, and because they were a BIG hit at my girlfriend’s baby shower, I knew I had to share. These cupcakes are rather special in that they accommodated my friend’s three food allergies by being dairy free, nut free and olive oil free. Those are some difficult ingredients to bake without, let me tell you! And while we have some lovely cupcake shops in town, none could say with full conviction they could deliver “safe” cupcakes. So I scoured the Internet for cupcake recipes, and once I found one that looked close enough, I made a few additional substitutions…
Now, just in case you’re thinking cupcakes without dairy, nuts and olive oil must be more healthy than the regular old kind…I wouldn’t go that far. But they are pretty darn delicious–in fact several shower attendees ate more than one–and they have an almost-moist inner texture. The beauty of this recipe? You can make substitutions throughout (I’ve noted where), so it could even be gluten-free if you want, or it could just become a standard cupcake recipe. Give them a try, and let me know what you think!
Vanilla Bean Cupcakes
2 cups all purpose flour (or substitute gluten-free flour)
1 cup sugar
1 teaspoon baking soda
1 teaspoon baking powder
½ teaspoon salt
2 eggs (or egg sub)
1 cup vanilla soy milk (or sub any type of milk – dairy, almond, coconut)
1 tablespoon vanilla bean paste (or vanilla extract)
3 tablespoons canola oil (or sub olive oil)
1/4 teaspoon lemon juice
Whisk together dry ingredients in a mixing bowl. Add in the wet ingredients (starting with eggs), and beat with a hand mixer until smooth, about 2 minutes. Divide batter evenly into 12-lined muffin cups. Bake 22-25 minutes, or until tops are lightly browned and a toothpick inserted into the center of the cupcakes comes out clean.
“Buttercream” Frosting
½ cup butter-flavored Crisco (or sub a butter substitute or regular butter at room temp)
4 cup powdered sugar
1/2 tablespoon vanilla bean paste (or vanilla extract)
Pinch of salt
Up to 1/4 cup water
Red food coloring
Using a hand mixer (or a stand mixer fitted with a paddle attachment) mix together the Crisco, sugar, vanilla, salt. Slowly add in the water until consistency is thick, smooth, and spreadable. Add a single drop of red food coloring and mix to combine. The frosting should be very pale pink. Place frosting into a piping bag (or plastic baggie with a corner cut off and a piping tip inserted). Slowly, in circular motions, apply the frosting to the top of each cupcake. For presentation, I topped each cupcake with a fresh raspberry and using a sifter, added a light dusting of powdered sugar on top.
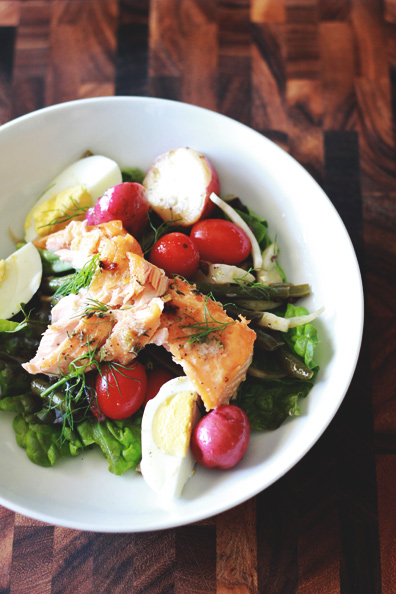
One of my very favorite meals come summertime is Salade Niçoise. I love to make a large platter and serve it family style, and I could eat the leftovers for days. It’s really something I never get tired of, and especially lovely to enjoy on warm evenings on the patio with a bottle of wine. Before my mom left earlier this week, she made the most delicious riff on traditional Niçoise—in place of the tuna, she grilled cedar-planked salmon, seasoned with lemon, thyme and pepper. It was pretty incredible and honestly this untraditional version is my new favorite. This salad also gets my vote with a Kalamata vinaigrette and crisp fennel added to the mix. Keep reading for the recipe, and I hope you’ll give it a try for yourself this summer!
Cedar-Planked Salmon Salade Niçoise
For the salmon:
1 tablespoon grated lemon zest
1 1/2 teaspoons chopped fresh thyme
1/2 teaspoon granulated sugar
Kosher salt and freshly ground black pepper
2 2-lb boneless, skin-on salmon fillets
2 tablespoons of extra-virgin olive oil
Soak the cedar planks in water to cover for at least 1 hour. Drain the planks. In a small bowl, combine the lemon zest, thyme, sugar, 1 1/2 teaspoon salt, and 1 tablespoon pepper. Rub the mixture together with your fingers until the zest is distributed throughout. Rub the salmon fillets on both sides with the olive oil, then set each fillet skin side down on a plank. Sprinkle the fillets with the lemon-pepper mixture, dividing it evenly. Gently rub the seasoning into the fillets. Let stand at room temperature while the grill heats. Prepare a gas or charcoal grill fire with high heat for indirect cooking. On a gas grill, heat all burners on high; then turn off all but one burner just before cooking the salmon. On a charcoal grill, bank the coals to two opposite sides of the grill. Arrange the planks over the cooler part of the grill, positioning them so the thickest part of the fish is closest to the heat source. Cover the grill and cook until the thickest part of each fillet registers about 135°F on an instant-read thermometer, 20-35 minutes depending on the thickness of the fillets. The planks may smoke a bit (this is fine) and will become very aromatic. Let the fillets rest on the planks for 5-10 minutes before serving.
For the vinaigrette:
6 tablespoons extra-virgin olive oil
1/3 cup Kalamata olives, pitted and minced (about 1/4 cup)
3 tablespoons white balsamic vinegar
1 medium clove garlic, finely grated
1/2 teaspoon finely grated lemon zest
1/2 teaspoon crushed red pepper flakes
Kosher salt and freshly ground black pepper
For the salad:
3/4 lb. baby red potatoes, cut into quarters
Kosher salt and freshly ground black pepper
1/2 lb. green beans, trimmed and cut into 1 1/2-inch lengths
1/2 lb. cherry or grape tomatoes, halved
1/2 small red onion, thinly sliced
1/2 medium fennel bulb, cored and thinly sliced
2 hard-boiled eggs, peeled and cut in half
2 cups mixed greens
Cedar-planked salmon, skin removed, cut into pieces
In a small bowl, combine the oil, olives, vinegar, garlic, lemon zest, and red pepper flakes. Whisk to combine and season to taste with salt and pepper. Set aside. Put the potatoes in a 4-quart saucepan, cover with 2 quarts water, add 1 tablespoon salt, and bring to a boil over high heat. Reduce the heat to medium and simmer gently until the potatoes are just tender when poked with a skewer, about 5 minutes. Using a slotted spoon, transfer the potatoes to a large bowl (save the cooking liquid).
Whisk the vinaigrette to recombine, drizzle 2 tablespoons of it over the potatoes, sprinkle with salt and pepper, and toss well. Set aside and let cool to room temperature.
Bring the water in the saucepan back to a boil over high heat. Meanwhile, fill a large bowl with ice water. Drop the green beans into the boiling water and cook until bright green and no longer raw but still very crisp, 1-2 minutes. Drain the beans in a colander and plunge them into the ice water to stop the cooking. Drain again and spread the beans on a clean dishtowel to dry. When the potatoes have cooled, add the green beans, tomatoes, onion, fennel, and all but 3 tablespoons of the vinaigrette and toss well. Season to taste with salt and pepper. To serve, add the mixed greens to bowls. Arrange green beans, tomatoes, onion, fennel on top. Top with the egg slices and salmon. Drizzle with extra vinaigrette and top with fennel fronds.
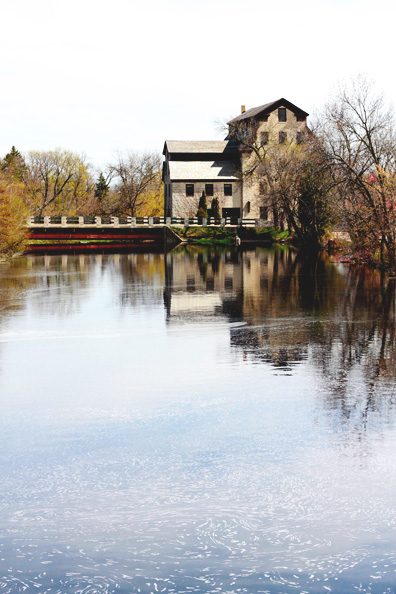
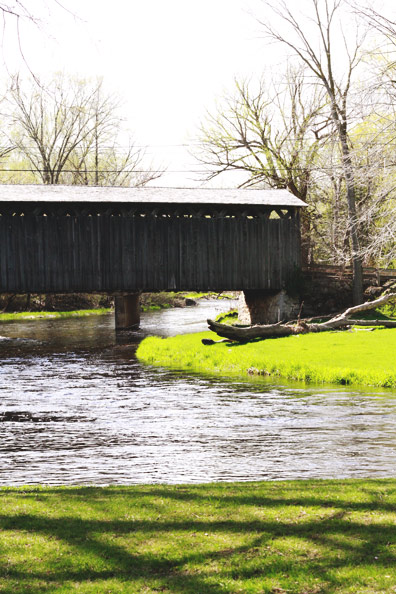
Just a 20-minute drive north of Milwaukee, or a 2-hour drive from Madison, Cedarburg is a historic town that sits along a river and boasts the last covered bridge in Wisconsin. The main street offers no shortage of cafes, restaurants, and specialty shops, as well as two inns and a winery. We paid the town a visit in an afternoon, which was all the time we really needed. The historic architecture and river setting are lovely, and you can wander in shops offering kitschy home decor, gardening supplies and gift things knowing you won’t be tempted to buy too much. The highlight for us was an olive oil and balsamic sampling store called Olive ‘n Vinnie’s. I brought home Herbs de Provence-infused olive oil and lavender balsamic, which I can’t wait to use on salads and grilled chicken this summer—yum! Keep reading for a few snaps from our visit, and be sure to check out my previous Wisconsin day trip to Lake Geneva.
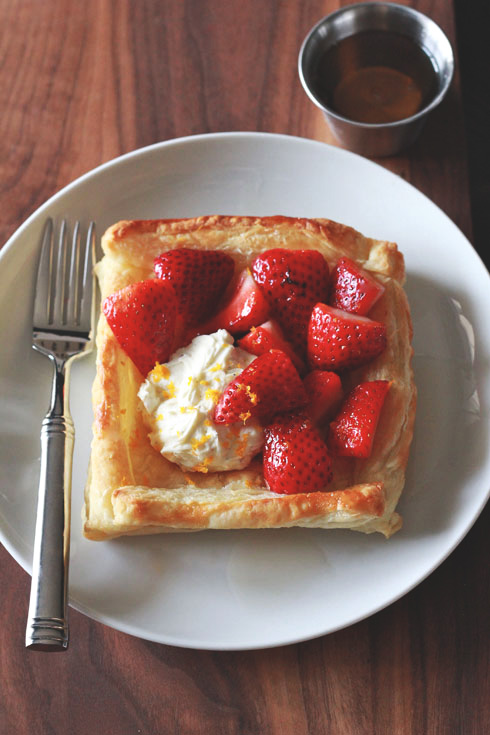
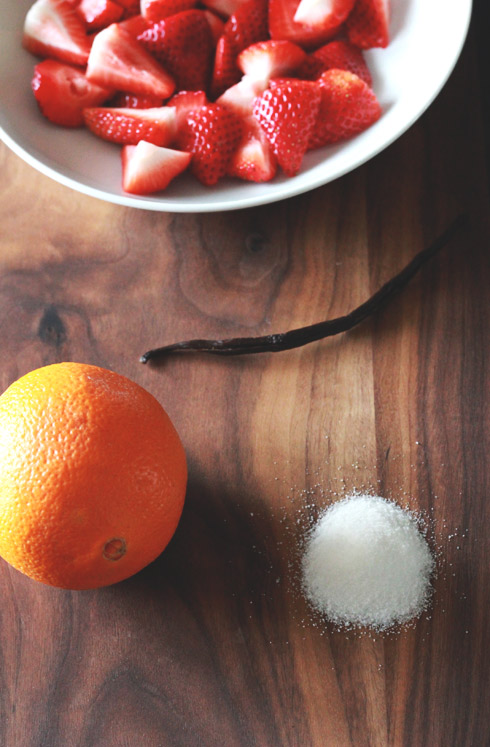
This week I’m over on Made By Girl with one of my favorite recipes yet: a simple-as-can-be tart that pairs the key ingredients from our wedding cake (our 6 year anniversary is later this month!)–fresh strawberries and vanilla mascarpone. I also whipped up a little brandy syrup to drizzle on top…it’s pretty much dessert perfection! I think you’ll be wanting to make these tarts all summer, whether just for two or for a crowd, because they’re that easy. Pop on over to check out the original Strawberry & Vanilla Mascarpone Tart, too!
Strawberry & Vanilla Mascarpone Tart with Brandy Syrup
1 large handful strawberries, tops removed and sliced in half
1 tablespoon sugar
1 orange
1 fresh vanilla bean, split and seeds scraped
1 sheet of store-bought puff pastry, defrosted
1 egg yolk, lightly beaten
1/2 of a small container of mascarpone
2 teaspoons powdered sugar
1 cup water
4 tablespoons brandy
1 cup sugar
To make the brandy syrup, place the water, brandy and sugar in a small saucepan over high heat and bring to a boil. Reduce heat to low and simmer 15 minutes or until the mixture thickens. Set aside and allow to cool. To macerate the strawberries, place sliced strawberries in a bowl. Sprinkle with 1 tablespoon of sugar, juice and zest of an orange, and half the seeds from a vanilla bean pod. Mix it all together gently. Preheat the oven to 400 degrees. Cut two squares from one sheet of pastry dough. Place on a baking tray lined with parchment paper. Cut 1/2-inch wide strips from the remaining pastry dough and place the strips around the pastry squares to form borders. Brush the tops of the borders with the egg, then bake for 15 minutes or until puffed and golden. Don’t forget to pierce the middle of each square with a fork before baking, so they don’t get quite as puffy inside as mine!
To make the filling, place the mascarpone, powdered sugar, and remaining half of the vanilla seeds in a bowl. Combine thoroughly with a fork. Set aside. To serve, spoon the vanilla mascarpone into the tarts and top with the macerated strawberries. Finish with a little extra orange zest, and serve with the brandy syrup. Makes 2.
You are currently browsing the Perpetually Chic blog archives for May, 2013.