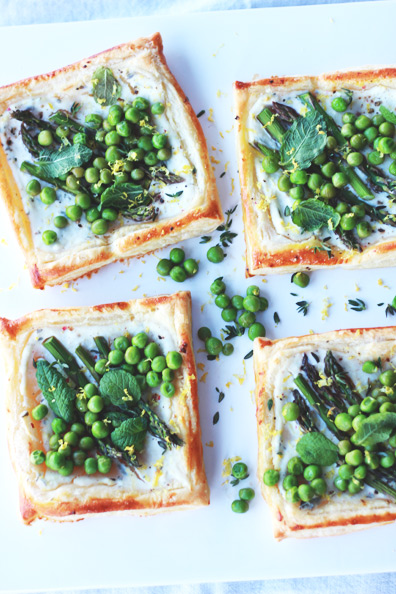
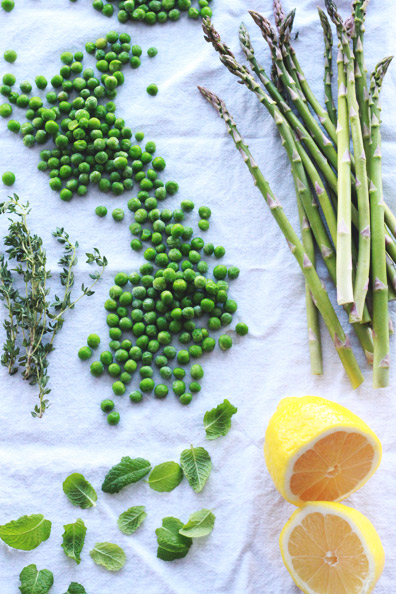
You guys, it’s going to be 50 degrees here tomorrow. Sweet relief! Even though the weather hasn’t been cooperating, I have already shifted to seasonal spring ingredients in my cooking…I put together these pretty spring tarts with asparagus, peas and mint (lemon and thyme ricotta too) for Made By Girl. They look and taste like spring to me and provide a lot of style without much effort for brunch and lunch get togethers. Maybe you’re still planning your Easter menu for this weekend? If so, I’d definitely add this to your spread. Be sure to jump on over to see the more photos!
Spring Tarts with Asparagus, Peas & Mint
1 sheet of store-bought puff pastry, thawed
A handful of thin asparagus, chopped into 2-3-inch long pieces with stems
3/4 cup ricotta
4 sprigs of thyme, leaves removed from stems
Juice of half a lemon
Zest of one lemon
Salt and pepper
1 egg, beaten
1 cup frozen peas, thawed
Olive oil and white balsamic vinegar
About 10 mint leaves
Fresh parmesan, grated
Preheat oven to 400 degrees. Lay a piece of parchment paper on a baking tray. Place the pastry sheet onto the parchment and cut into 4 squares. Score a 1-inch border around the edge of each square and prick once in the middle with a fork. Mix the ricotta with lemon juice, half the zest, thyme, salt, and pepper. Spread the ricotta mixture evenly inside the border of each square. Note that you may not use it all. Top each square with a few pieces of asparagus on the diagonal. Sprinkle with remaining lemon zest and season with freshly ground pepper. Brush the borders of each tart with the beaten egg, then bake for 15-20 minutes or until golden. Place peas in a small bowl and drizzle with olive oil and white balsamic; toss to combine and season with salt and pepper. Top the cooked tarts with the peas, then finish with mint leaves, a bit of grated Parmesan, and additional lemon zest if desired.
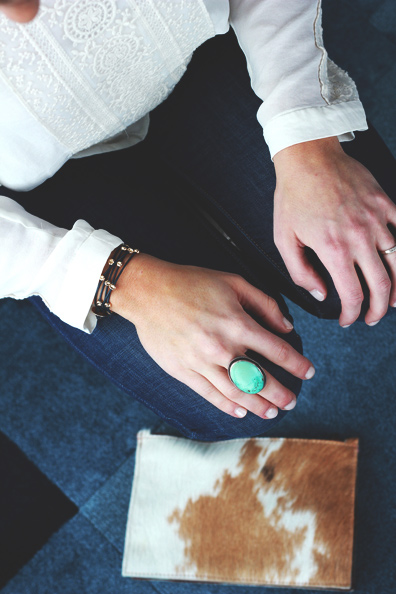
Outfit details: Zara blouse | Anthropologie jeans | old Nine West heels | Clutch (similar) | vintage turquoise ring
Have you ever thought about your personal uniform? You know, is there a signature outfit that you repeat time and again or a look that kind of sums up your style? I’m admittedly a bit of a chameleon when it comes to getting dressed, bouncing between a lot of different styles from boho to preppy, super girly to a little bit edgy. But when it really comes down to it, I mostly lean toward effortless looks with a twist. This outfit, whether worn on a casual Friday at work or for date night (both recently), is very me. A top knot is my hairdo of choice about half of any given week, and flowy, feminine blouses paired with skinny pants are what you’ll find me wearing most days. Then I usually add some unexpected detail that has a story, whether a bit of vintage like my grandmother’s turquoise ring or a little global treasure like this cowhide clutch my sister gifted to me from Argentina. I always feel most comfortable on days when I just don’t think about it too much. What’s your go-to outfit? I’d love to hear!
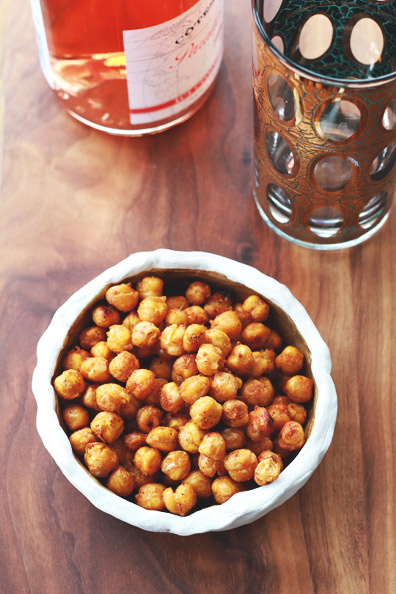
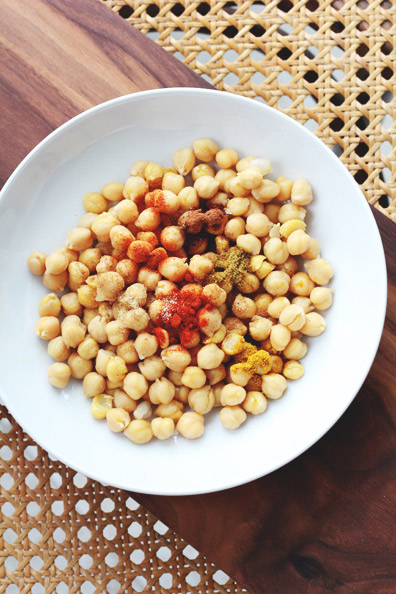
Having settled into a crispy chickpea obsession (did you try my rosemary version yet?), I’ve been doing some experimenting and landed on a new recipe I may like even better. Safe to say whether seasoned with rosemary and sea salt or Middle Eastern spices like this, crispy chickpeas are our current favorite snack. I’m looking forward to serving these straight out of the oven alongside glasses of rosé for patio parties all summer. Now if the snow will just melt away…
Moroccan Spiced Chickpeas
1 can chickpeas, drained and rinsed
1 tablespoon olive oil
1/4 teaspoon each of ground cumin, ground coriander, smoked (or regular) paprika, garlic powder, cayenne, cinnamon and curry powder
Sea salt to taste
Preheat oven to 425 degrees. Place rinsed chickpeas on a paper towel and place another paper towel on top. Leave them there for about 10 minutes—the paper towels will soak up the moisture for you. Add chickpeas to a bowl, drizzle with olive oil and season with cumin, coriander, paprika, garlic powder, cayenne, cinnamon, curry powder and sea salt. Spread chickpeas onto a baking sheet and bake for 10 minutes; toss then bake another 10 minutes. Transfer crispy chickpeas to a bowl and sprinkle with a dash more of each spice and more salt if desired. Toss to combine and transfer to serving bowl or cup.
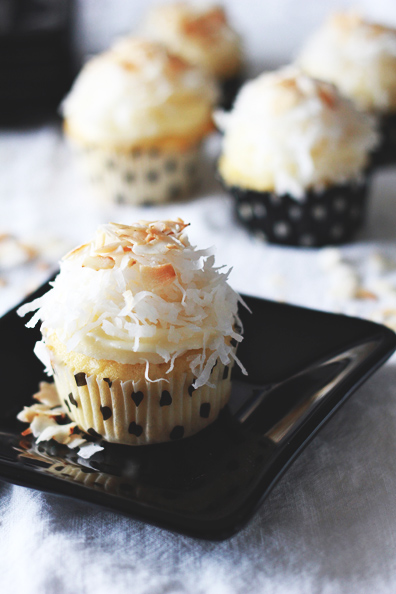
Elizabeth’s back today with a second installment of One Last Bite. It has been years since she made these cupcakes, but when she was in grad school, she was known for them. Elizabeth, take it away…
Party invites always came with requests for “those incredible cupcakes you brought to the last shindig.” And now I remember why I loved making this recipe so much (aside from the glowing reviews): it helped to slow me down. As a grad student, whenever I got too stressed and over-caffeinated, I turned to baking. I started with quick, boxed brownie batters and refrigerator cookie dough, but none of these prepared mixes kept my hands and mind busy long enough to calm me down. And then I found this recipe.
This isn’t a fast recipe that you bake at the last minute, dumping your ingredients into a bowl, giving it a little mix, and tossing it in the oven. It’s a recipe that requires all of your attention to get everything just right. These cupcakes do take time—a few hours, counting the time it takes to let the eggs, butter, and cream cheese reach room temperature, to cream the butter & sugar, to add the eggs one at a time, to wait (rather impatiently) for the cupcakes to cool completely before you can frost them. But then, after all of that waiting, and mixing, and baking, and waiting some more, and frosting, you’ll take one bite and discover that these cupcakes are somehow both dense and fluffy—both thick in the thighs and light on their feet. That they are full of coconut flavor. That the cream cheese frosting adds the perfect tang and creaminess. In that one bite you’ll suddenly realize that, like Spring, it was definitely worth the wait.
Coconut Cupcakes with Cream Cheese Frosting
3/4 pound (3 sticks) unsalted butter, room temperature 2 cups sugar
5 extra-large (or 6 large) eggs at room temperature 2 teaspoons pure vanilla extract
1/2 teaspoon pure almond extract
2 teaspoons coconut milk
3 cups flour
1 teaspoon baking powder
1/2 teaspoon baking soda
1/2 teaspoon kosher salt
1 cup buttermilk
14 ounces sweetened, shredded coconut
For the frosting:
12 oz. cream cheese (1 1/2 standard boxes) at room temperature 1/2 pound (2 sticks) unsalted butter, room temperature 3/4 teaspoon pure vanilla extract
1/4 teaspoon pure almond extract
2 1/2+ cups confectioners’ sugar (to taste), sifted 1 1/4 cups unsweetened coconut flakes, toasted
Note: Make sure that the necessary ingredients are at room temperature or sifted. If you don’t, the ingredients won’t mix properly and you’ll end up with flat, dry cupcakes and lumpy frosting.
Preheat the oven to 325 degrees F. Line a muffin pan with paper liners. In the bowl of an electric mixer fitted with the paddle attachment, cream the butter and sugar on high speed until light and fluffy, at least five minutes. (NOTE: This step is very important! If you cut back the time on creaming the butter & sugar, you’ll get dense, dry, and very sad cupcakes—and nobody likes a sad cupcake.) With the mixer on low speed, add the eggs, one at a time, scraping down the bowl after each addition. Add the coconut milk and the vanilla and almond extracts and mix well.
In a separate bowl, sift together the flour, baking powder, baking soda, and salt. In three parts, alternately add the dry ingredients and the buttermilk to the batter, beginning and ending with the dry. Mix until just combined. Fold in seven ounces of the sweetened coconut. Fill each liner 3/4 full with batter. Bake for 18 to 30 minutes, until a toothpick comes out clean. Start checking at 18 minutes. If your oven runs hot, you don’t want to over bake these cupcakes. Allow to cool in the pan for 15 minutes. Remove to a baking rack and cool completely.
Meanwhile, make the frosting. In the bowl of an electric mixer fitted with the paddle attachment, on low speed, cream together the cream cheese, butter, and vanilla and almond extracts. Add the confectioners’ sugar and mix until smooth. Taste and add more confectioners’ sugar if you prefer a sweeter frosting, mixing until smooth.
Once the cupcakes are completely cool, use a piping bag (or a Ziploc bag with a corner cut off) to swirl on the frosting. Top the frosted cupcakes with a generous pile of the sweetened coconut and finish with a few flakes of toasted coconut for color. Sit down, have a cupcake with a glass of champagne, and marvel at the fact that you just made the most delicious cupcake you’ve ever eaten.
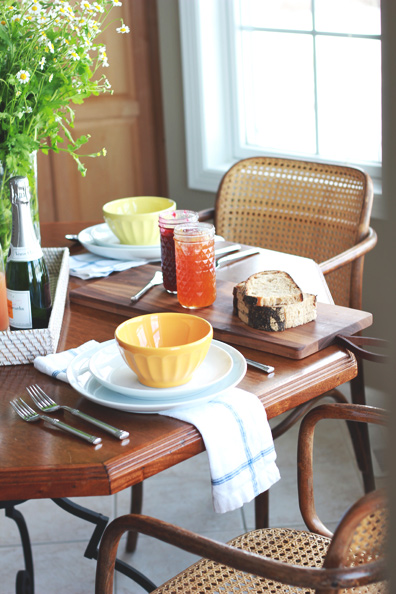
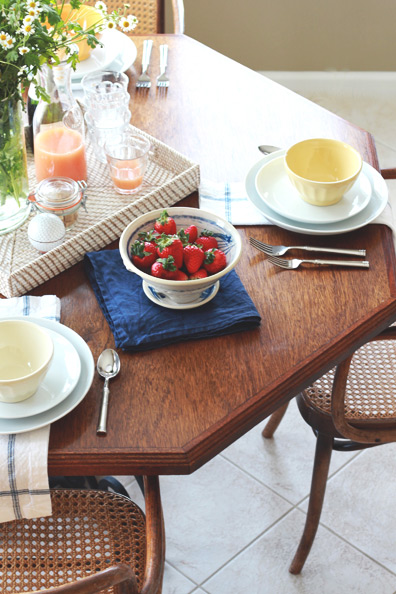
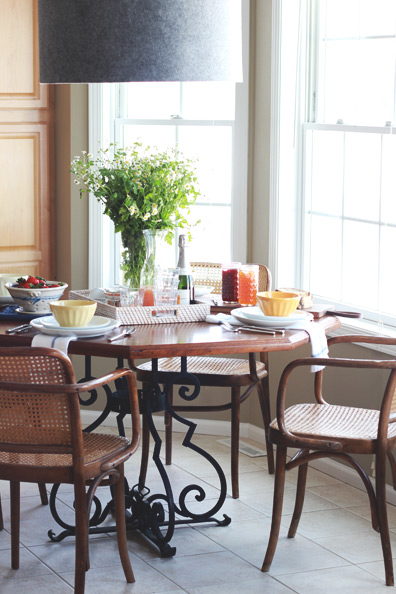
It feels as if winter will never end, but the promise of spring is so near—today is the official first day of the season! To me, the best solution for a lingering winter is to bring spring indoors and brighten up meals with cheerful decor. Following Monday’s frittata recipe and yesterday’s outfit, I thought I’d share a spring table setting idea that’s so incredibly simple and easy for anyone to recreate. Whether you’re inviting friends over for a casual brunch or setting your table for Easter, this look is light and fresh. While there are millions of beautiful table setting ideas out there on Pinterest and blogs for any occasion, what always strikes me is how elaborate they are. There’s definitely a time and place for over-the-top, fanciful spreads, but my entertaining style (and maybe yours too?) is much more casual. But casual does not mean void of style—it’s about putting some thoughtfulness to the details but also creating a comfortable, not overdone vibe. Your friends will definitely notice your extra effort, but won’t feel thrown off by formality.
I thought twice about sharing this casual brunch setting because it is so super simple. But that’s the point. I often start with flowers—something in season I can find at the grocery or farmers’ market—and let them inspire the rest of the direction I take. In this case, I set out a large bunch of chamomile flowers, loosely flowing out of a simple tall vase. I then layered a whitewashed rattan tray underneath, which also provided a perfect space for help-yourself mimosas.
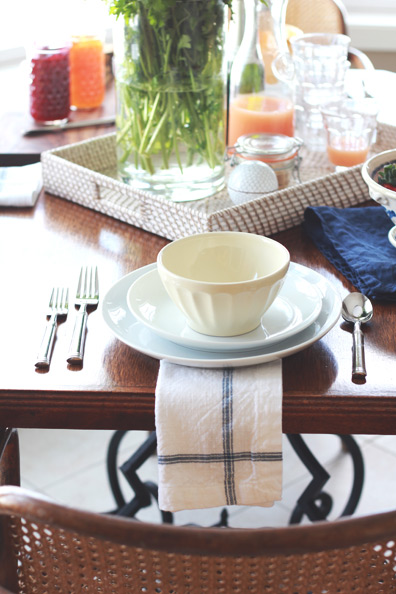
I love collecting cloth napkins for entertaining—to me it’s the simplest way to lend sophistication to mealtime, even when it’s just the two of us. Plus unlike paper napkins, they’re washable and reusable. I pick up a new set here and there to add to my collection so I can rotate them. Instead of placing them at the side of the dinnerware, I layered them underneath for a different look and love how they just hang off the edges of our kitchen table. And to achieve more of that fresh, sunny spring look, I placed just the yellow shades of my favorite Anthropologie bowls on top of our everyday white plates. I’m also a big fan of family-style serving. From setting a frittata directly on the table, straight out of the oven, to pouring cocktails, juices and even milk into carafes, it’s a great presentation trick that somehow feels both elegant and carefree at the same time.
What’s your entertaining style? Any favorite hosting tips? Happy first day of spring!
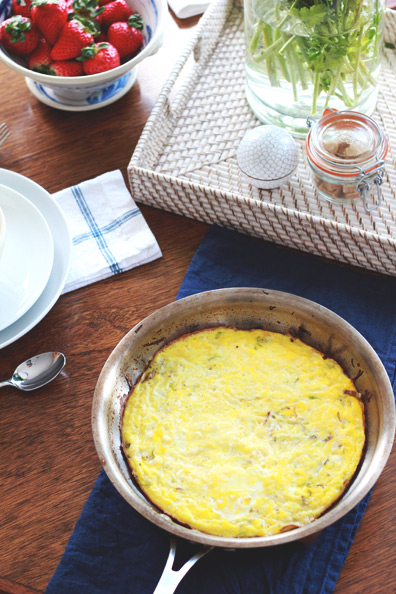
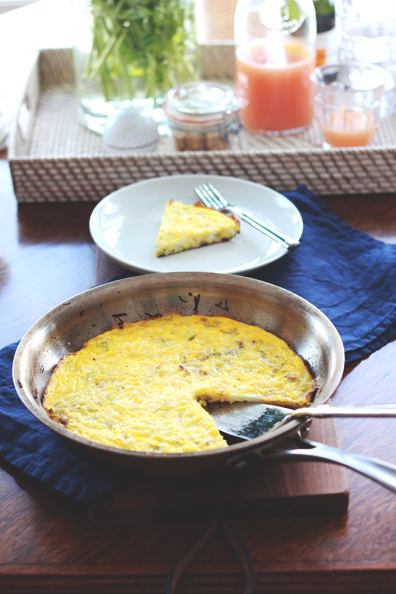
One of my go-to brunch recipes is a super simple frittata. With minimal effort, you get something that looks way more impressive than your basic scrambled eggs. Frittatas are great because the flavor options are endless—sun-dried tomato and artichoke, mushroom and spinach, sweet potato and kale. As we head into spring, however, my favorite variation is leek and Gruyère. Follow the jump for the recipe, and stay tuned for more spring brunch inspiration (an outfit and a table setting) this week!
Leek & Gruyère Frittata
1 tablespoon unsalted butter
1 tablespoon extra virgin olive oil
1 large leek, washed and thinly sliced
Coarse salt
Freshly ground pepper
Garlic powder
6 large eggs
1/2 cup milk
1/2 cup of Gruyère cheese, grated
Crushed red pepper flakes
Preheat oven to 375 degrees. Heat the butter and olive oil over medium heat in a 10-inch, oven-safe skillet. Saute the leek slices until soft and just barely browned, about 6 minutes. Season with lots of salt and pepper and a dash of garlic powder. In a bowl, beat the eggs and milk to combine. Pour over the leek slices into the skillet. Sprinkle the top with cheese and red pepper flakes. Let cook for about 5 minutes, or until the edges just set (the middle will still be very runny). Transfer to the oven for 8 minutes to set throughout.
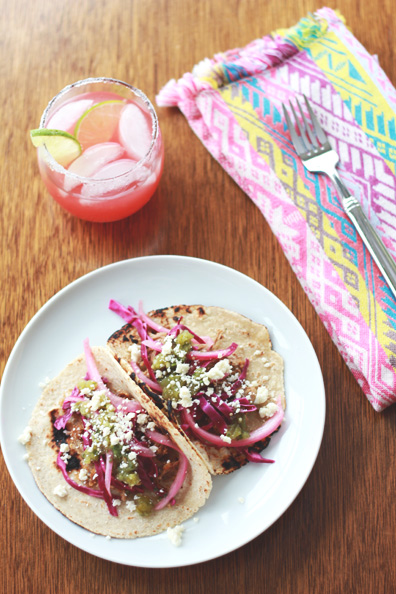
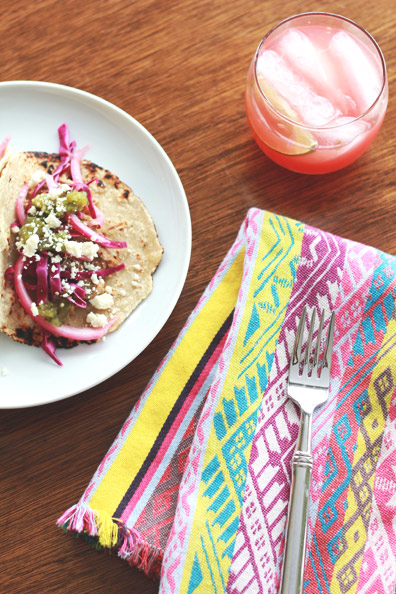
Please tell me you like tacos? And margaritas? We’re big fans of the taco at our house. Blame it on my Texas roots, but I can’t get enough. We make them in some shape or form at least once a week, and they’re our go-to meal when entertaining guests. And don’t even get me started on how perfectly happy I am with an icy cold margarita in my other hand. Heaven… We had friends over for taco night last weekend and served up our most-loved, often-repeated toppings: beer- and salsa-braised pulled pork, pickled red onions, salted cabbage, lime crema and queso fresco cheese. And new to the mix: tomatillo salsa and watermelon margaritas. Recipes follow, and I’d LOVE to hear about your favorite tacos and margaritas!
Beer-Braised Pulled Pork
3 pound boneless pork butt or shoulder, trimmed of excess fat
1 yellow onion, sliced
1 jar of Arriba! Medium Fire-Roasted Mexican Red Salsa
1 beer
Spices: chili powder, garlic powder, oregano, cumin, salt, pepper
Cut pork into 4-inch cubes. Combine all spices in a bowl, then generously season the meat with the rub, pressing into the meat with your hands. In a skillet over medium-high heat, saute onion in olive oil and then add pork. Sear about 2 minutes on each side until browned but not cooked through. Transfer the pork and onions to a large baking dish; cover with salsa, evenly distributing over the meat. Pour the beer into the baking dish. Cook on low heat (about 300 degrees), covered with foil, for 4 hours. After 4 hours, the meat should easily fall apart when pulled with two forks. Shred it all.
Picked Red Onions
2 medium red onions (or 1 very large one)
Juice of two limes
1 cup of red wine vinegar
1/2 cup distilled white vinegar
1 tablespoon of sugar
2 teaspoons salt
1/2 cup of fresh cilantro
A few sprigs of fresh thyme
Peel onions and half each from tip to root. Thinly slice the onion from tip to root using a knife (or use a mandolin). In a mason jar or medium bowl with a lid, combine lime juice, vinegars, sugar and salt. Stir well to completely dissolve the sugar and salt–or just place the lid on the jar and shake vigorously. Add the sliced onion and fresh herbs. Stir, and press the onions and herbs into the liquid. Top off with a little extra red wine vinegar. Cover and let the pickling process begin. The flavor will develop within an hour, but is best after 24 hours in the fridge.
Salted Cabbage
1/2 red or green cabbage, chopped into thin strips
Juice of 1/2 lime
Pinch of salt
Combine all ingredients and let sit 30 minutes.
Lime Crema
1/2 cup sour cream
1 tablespoon of lime juice
Combine ingredients and stir to mix.
Watermelon Margaritas
1 1/2 cups of fresh watermelon juice
1/2 cup fresh lime juice
1 cup of simple syrup
3/4 cup silver tequila
1/4 cup triple sec
1 1/2 cups ice
Cut a watermelon into 1-inch cubes and place in a food processor or blender. Blend until it becomes juice. Transfer to a pitcher. Add lime juice, simple syrup, tequila, and triple sec. Stir then add ice. Refrigerate for at least 30 minutes to a few hours. Stir and serve over ice.
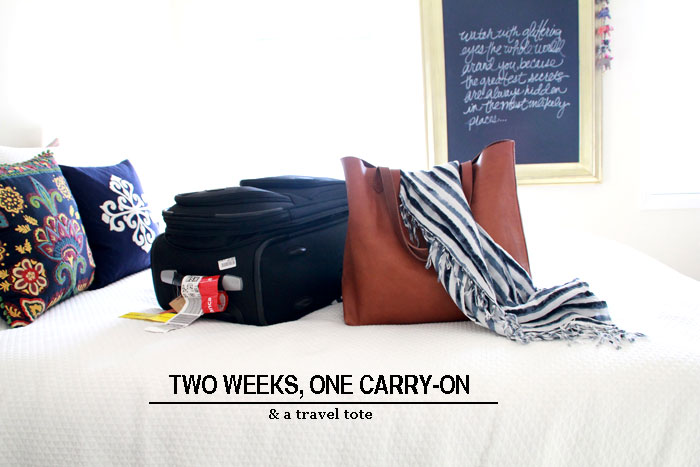
I don’t think I”ll ever claim to be an expert at packing. I feel like unless you travel really often (like my husband does for work), you kind of get out of practice. But while I may not be fast at packing, I have mastered the art of it for long trips—starting early, strategically planning outfits, editing things down. No more overpacking here! It’s become a proud accomplishment to be able to pack for two, even three, weeks and multiple cities in a single carry-on suitcase. My husband gives me a gold star for my effort, we don’t have pesky baggage fees, and we never face the dreaded lost bag situation. And once we arrive at our destination (or home), we’re on our way—no waiting around the baggage carousel.
What about you guys? Are you a chronic over-packer or a carry-on convert? After our most recent trip to here and here, I snapped a few photos of what I packed so I could share my process with you. This is Part 1 of two posts, and hopefully it will help when it comes time for your next adventure. Maybe you’ll even get a little vacation outfit inspiration too. See what’s in my travel tote and my tips on how to pack for two weeks (and two cities) in just one carry-on!
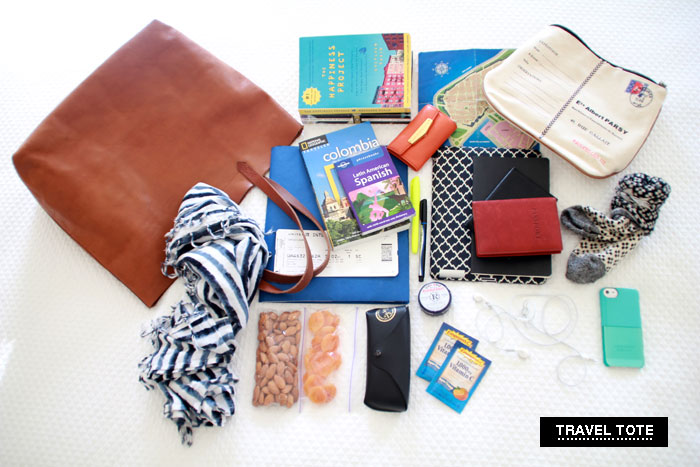
Travel Tote Essentials
First things, first. Grab a bag–like this one by Madewell–that can fit a lot of travel necessities you’ll want on hand…
A versatile sarong for the beach/pool that doubles as a scarf and triples as a light blanket for the plane
Snacks (I like almonds and apricots) for hunger pangs in between meals
Sunglasses in their case means no scratching
Emergen-C for fighting off colds before and during the trip
Headphones for jams on the plane or beach
iPhone for Instagram and Spotify…but not email or work!
Thick socks for keeping toes warm on the plane
Passports (I carry his, too)
Journal for jotting down favorite spots and memories
iPad for watching movies on long flights
Pen and highlighter for last-minute travel research
Travel guides and a folder with reservation info and printed pre-travel research
Books to read leisurely
Wallet with a bit of cash
A big pouch to put all the little bits and pieces in
Note: When traveling with a laptop, I use a more structured bag (Lo & Sons O.M.G.).
You may be wondering about cameras, lenses, memory cards, phone power cords, outlet adapters…my husband packages all the small pieces into Ziploc bags and carries our gadgets in his personal item (usually a backpack).
10 Tips for Packing Light
Research your destination. What will the weather be like? Are there any cultural sensitivities – is there any clothing not acceptable in certain places (ex. temples, churches, museums)?
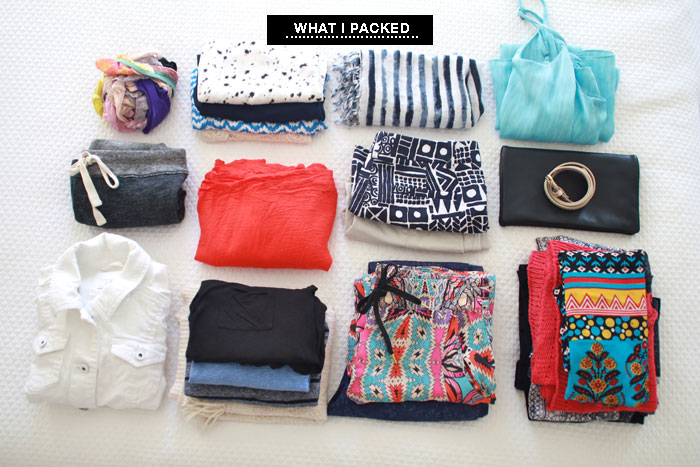
Consider your activities. We did a lot of city walking, excursions and beach time during our last two trips. I didn’t bring a single pair of heels and instead opted for cute flat sandals that could transition from day to night.
Plan out your outfits. It’s totally worth the effort and helps prevent overpacking. Pick versatile pieces you can mix and match for different looks. Bring a few accessories to dress things up, but nothing you’d be heartbroken about losing.
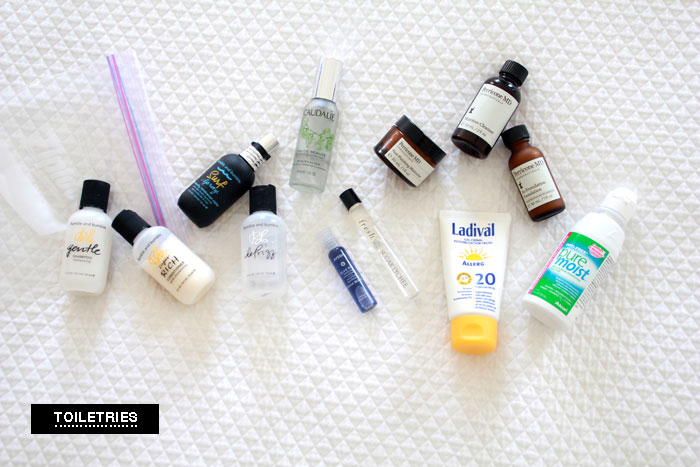
Pare down your makeup and toiletries. How much time do you really want to spend doing your hair every day? Skip the heavy, bulky hairdryer and curling iron for sure. Let your hair air dry if you can—and the top knot can become your best friend.
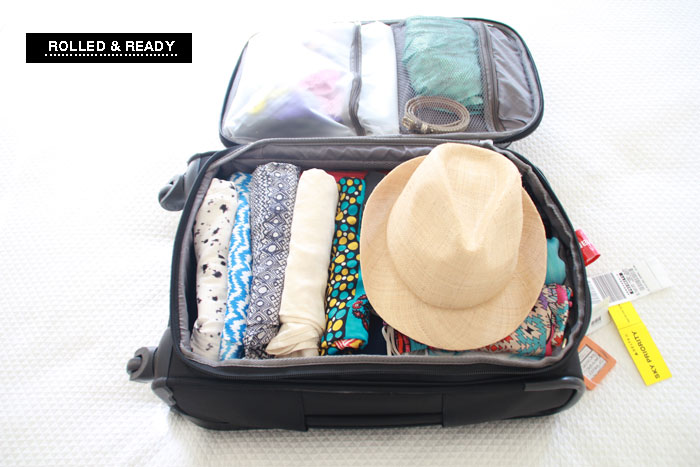
Tightly roll everything. I mean, everything. Rolling takes up less space than folding and minimizes wrinkling.
Layer heavy to light. Shoes first, then heavier rolled clothing (jeans and pants). Lighter materials, especially linen or silk, should be added last.
Reduce your shoe count. Cut back or at least pack shoes that fold very flat. For warm-weather getaways, I pack a pair of sneakers or Toms, a ballet flat, and one (or maybe two) sandals. Cheap flip flops too.
Stuff the extras. Underwear and swimwear can be pushed into an interior pocket. Tuck jewelry in a small pouch or right into a clutch.
Strategize your quart-sized bag. Figure out what your most-needed toiletries are and only what fits in the bag goes. Place it in the exterior pocket of your suitcase for easy removing in the security line.
Don’t forget to leave a little space. A little room in your suitcase and personal item means room for a few travel treasures to bring home.
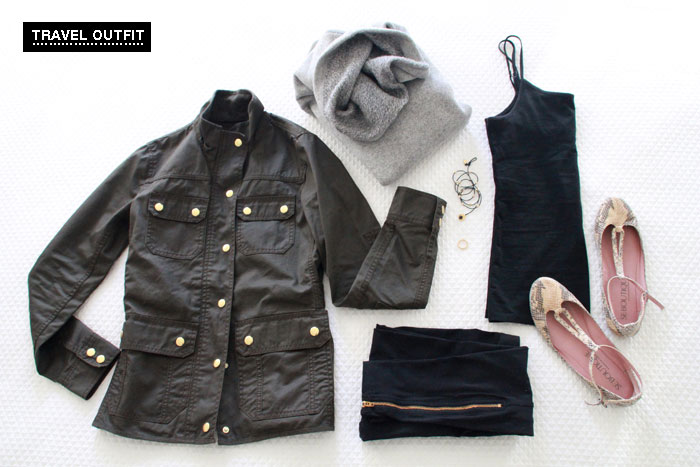
A note on my travel outfit — I wore a few extra layers while traveling (see image outfit above), since we left with snow at home and returned to it. Thick black leggings and a black tank are my comfortable staples, I just make them airport appropriate with cute flats and long layers on top.
What are your travel tricks? I’d love to hear! Feel free to ask questions about any of the specific items pictured – I’ll gladly answer!