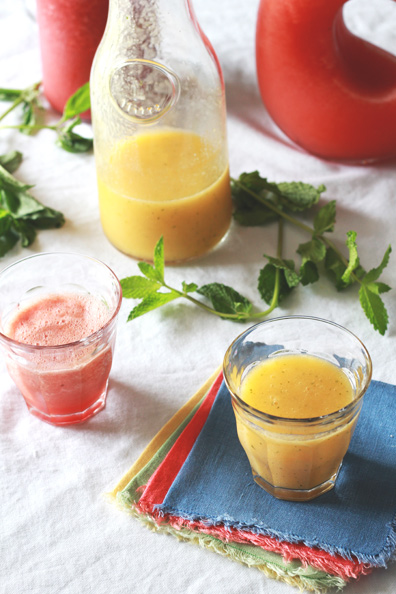
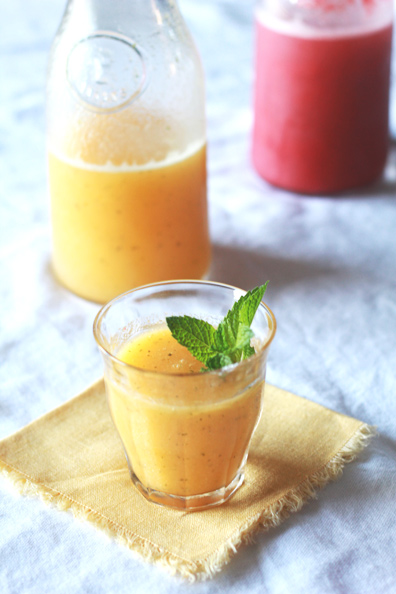
Come summertime, I always lighten things up for the season as the temps increase—whether in the clothes I wear (breezy sun dresses and strappy sandals) or the food I make (tons of crisp salads and fresh fruit). One of the best ways to cool down on a hot day is to sip an agua fresca, a popular drink in Texas, Mexico and Latin America. Made with pureed fruit, water, a squeeze of lime, touch of sugar and sometimes herbs, agua frescas are all natural and couldn’t be any easier to make at home. At our wedding, we served watermelon-prickly pear and mango-cantaloupe agua frescas as refreshing, non-alcoholic options for guests. Watermelon is still my all-time favorite agua fresca flavor, but I decided to test Cantaloupe-Mint and Strawberry-Basil versions for serving at patio parties all summer long. Here are the super simple recipes!
Cantaloupe-Mint Agua Fresca
1 cantaloupe, chopped into large pieces
4 very large mint leaves
1 tablespoon agave nectar
Juice of half a lime
1 cup of ice-cold water
1 cup of ice
Strawberry-Basil Agua Fresca
1 pound package of strawberries, tops removed
3 very large basil leaves
1 tablespoon agave nectar
Juice of half a lime
1 cup of ice-cold water
1 cup of ice
Puree fruit, herbs, agave, lime juice and water until smooth. Taste and adjust to your preference—more water can be added if you’d like the mixture to be less concentrated, or additional agave can make it sweeter. Strain the mixture through a fine-mesh sieve or through cheesecloth into a pitcher. (Note, if you’re using a Vitamix, you can probably skip this step.) Fill glasses with ice and divide agua fresca among glasses. Add soda water for a bit of fizz or alcohol for a spiked version.
Do you guys remember Kate Hudson’s head-turning yellow evening gown from the movie “How to Lose a Guy in 10 Days?” Like most girls at the time of its release, I was obsessed, and the idea of a yellow dress has been firmly ingrained in my memory ever since. I spotted this yellow silk maxi at Bop two years ago when it was out of season, and I knew I wanted it despite my best efforts to resist (I came back to the store and tried it on several times before purchasing). Where would I even wear such a bold dress? I finally gave in to my longing for a yellow dress and am SO happy I did…
I’ve worn this dress with different combinations of accessories to a few weddings now, and this summer I’m thinking I might even try it with flat sandals. Last weekend I pulled it out to play dress up for a Saturday evening at the theater followed by late-night drinks and dessert at Gilt Bar, and gave it an entirely different look with a classic navy blazer since it was a bit chilly in Chicago.
On Friday night, we celebrated our sixth wedding anniversary a few days early with an incredible dinner at the Pump Room, the glamorous restaurant at the hip PUBLIC hotel in Chicago where we spent the weekend. The atmosphere—with glowing globes overhead—was romantic and renowned chef Jean-Georges’ menu was a delight. I wore a striped bodycon dress that is incredibly flattering: in figure-hugging material, it creates the illusion of curves where I may be lacking and is super comfortable to boot. I balanced the graphic stripes of the dress with vintage jewelry, my favorite Aquazzura heels and a pop of blue from my Clare Vivier clutch. I’ll share date night number two’s outfit tomorrow!
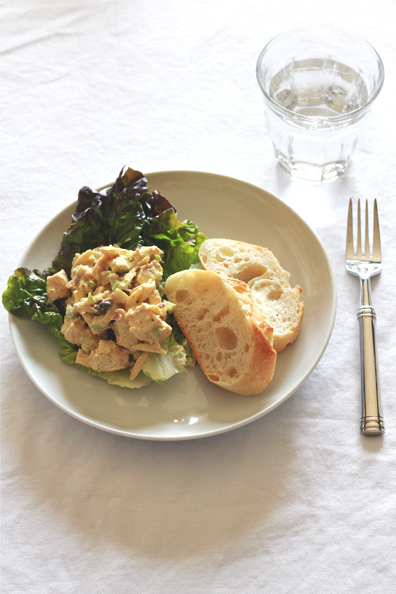
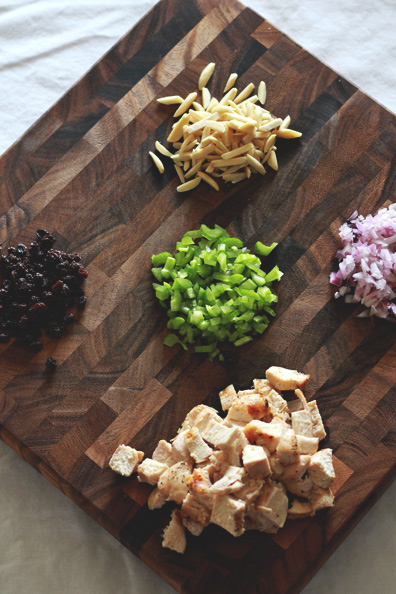
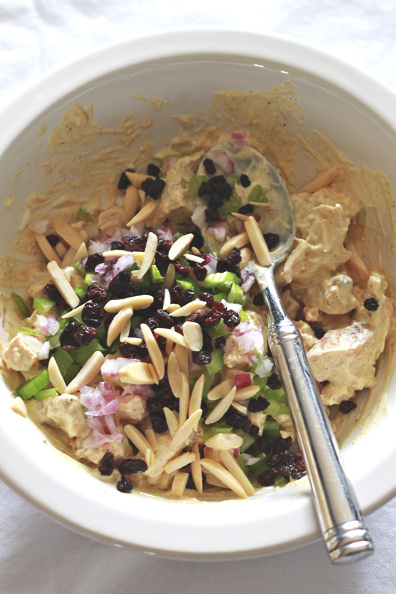
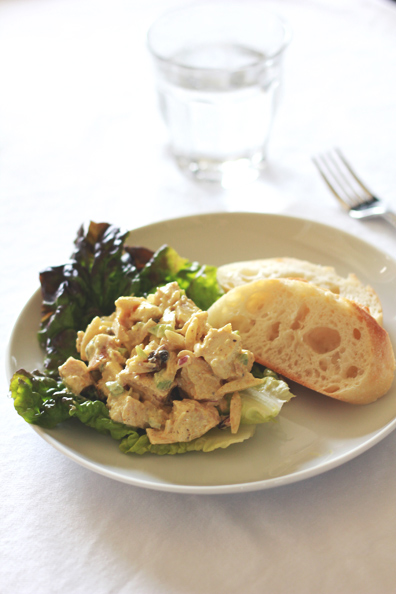
I finally broke down and figured out how to make my favorite curried chicken salad from Whole Foods at home! I substituted Greek yogurt for the mayo, and I love the tang it gives mixed with the curry, crunch of the celery and almonds, and sweetness of the currants. The recipe is super simple–a great use for leftover chicken or even a rotisserie chicken if you’re short on time. Here’s the recipe!
Curried Chicken Salad
2 boneless, skinless chicken breasts
Salt, pepper and garlic powder
6 tablespoons Greek yogurt
1/4 cup slivered almonds
1/4 cup finely diced celery
1/4 cup dried currants
1/4 cup minced red onion
1 teaspoon curry powder
1/2 teaspoon salt
a dash of ground tumeric
Season chicken breasts generously with salt, ground black pepper and garlic powder. Cook over medium-high heat on a grill, about 4 minutes per side. Roughly chop into cubes. In a bowl, whisk together the yogurt, curry powder, salt and tumeric. Add the cooked chicken and stir to coat. Then add the almonds, celery, currants and onion. Mix well to combine. Serve on top of lettuce with bread or crackers on the side.
Elizabeth’s dropping in today with a new One Last Bite. These brownies are equal parts strange and awesome.
I’m so excited to share this recipe, which I consider to be the Willy Wonk-iest of all brownies. I confess: at first bite, the flavors don’t make sense. It starts with a rush of salt, which is swiftly counterbalanced by the bitterness of dark chocolate, and brightened at the very end by the tang of lime. But once you take the second bite, all of the flavors come together and simply…make sense. This recipe is the perfect marriage of extremes: salty, bitter, sour, and sweet. Taken individually, they are severe, dominating, even unpalatable. Together, they mellow and unwind—as if they were meant to be in one another’s company. Enjoy.
Margarita Brownies
Adapted from The Kitchn; yields 16 2-inch square brownies
1/2 cup + 2 tablespoons unsalted butter
4 ounces bittersweet chocolate, chopped coarsely
1 cup sugar
3/4 cup all purpose flour
1/4 cup Dutch process cocoa powder
2 large eggs, lightly beaten
1 teaspoon vanilla
1/4 teaspoon kosher salt
1 lime, juiced and zested
2 ounces unsweetened chocolate, finely chopped
3/4 teaspoon flaky sea salt
Preheat oven to 325°F and line an 8×8-inch baking pan with parchment paper, leaving the paper extra-long and hanging over two sides. In a medium saucepan, melt the butter and bittersweet chocolate over medium-low heat. Stir until smooth. Remove pan from the heat and add the sugar, flour, cocoa powder, eggs, vanilla and kosher salt. Mix until combined. Then add lime juice and zest, as well as the finely chopped unsweetened chocolate. Stir to combine and pour into prepared pan. Sprinkle the sea salt on the top. Bake for 30 to 35 minutes or until a tester comes out moist. It will not be perfectly clean, but it shouldn’t be sticky either. Allow pan to cool on a wire rack for 15 minutes before removing brownies from pan. To remove the brownies, run a knife around the sides of the pan to help release the brownies, then lift out the parchment paper. Place the brownies on the paper back on the wire rack. Cool completely and cut into 2 inch squares.
*Post by Elizabeth Ansfield, photos by Lauren Craig
This is Erin with Rosehip Flora, and today I’d like to share a how-to on a smaller scale. Let’s look at making a simple and sweet boutonnière or corsage for your sweetheart. Ladies and gents alike can’t complain about a handcrafted gift for a special occasion. The first time I cooked dinner for my last boyfriend (now husband), I had some blooms on hand and fashioned a lovely little boutonniere for him to wear. It was a welcoming gift – welcome to my home, welcome to my life, welcome to my heart. He had never been presented with such a gift before, and I certainly have no regrets about making this sentimental gesture. Keep reading for the step-by-step instructions… For this project I used a small succulent plant, Paranormus (the soft spikes), which I’ve never seen before but now love enormous (ha!), red and white variegated Waxflower, and a lone Gardenia leaf as a backdrop to the whole ensemble. Tools include floral wire, floral tape, straight pins, pearl headed pins, wire cutters, scissors and ribbon to wrap.
I began wiring the succulent and gardenia leaf by hair pinning the floral wire and feeding into the center of both elements.
Those wires are then finished with floral tape. It’s important to stretch the tape out as you wrap to reveal it’s ‘sticky’ side. Wrapping the stems will help seal in their moisture. The paranormus and waxflower do not need to be wired in this scenario because they are hardy and can stand alone.
I cleaned the little leaves off the stems of the paranormus to make the wrapping and combining easier and cleaner.
Holding the gardenia leaf, I placed the paranormus stems, one at a time, and wrapped these pieces together with the green floral tape.
Next I placed the succulent at the base of the paramorus and taped its wire into place. Then the waxflower filled in spots around the succulent and was taped into place. The third and final piece of paranormus was taped lower in the arrangement.
The raw stems of the paranormus and waxflower were cut to the desired length with scissors and wired pieces cut with wire cutters.
The floral tape then wraps and covers all stems and wires – pull and twirl – to make a single ‘stem’ for the boutonniere.
To finish the look, I choose a burlap ribbon to hide the floral-tape stem. Wrap the ribbon overlapping itself and leave a little tail behind. Secure the ribbon to the stem with a straight pin. Then I fanned out the ribbon for a rough burlap look.
Last, pin with a pearl-headed pin by pushing the pin into the fabric from front (protecting with your hand from the back/inside of fabric) and feeding the pin through the entire stem of boutonniere. The point of the pin should then re-enter the fabric so the point is not visible. Ideally this would be through a lapel, which is doubled and the pin can rest between the ‘fold’ of the lapel.
Now stand back and admire your handiwork! And have fun! Enjoy.
Tutorial by Erin Knipp of Rosehip Flora, photos by Julie Cope Photography for Perpetually Chic
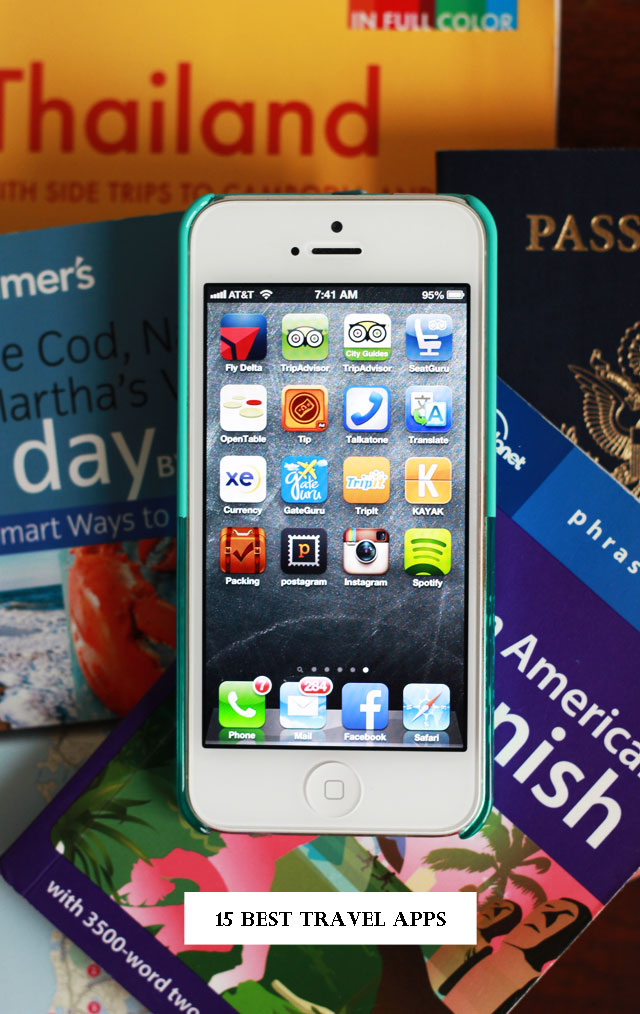
Book a flight, find a hotel, scout out the best seat on the plane, snag insider tips on the best restaurants, tip with confidence, snap your own postcard. There’s pretty much an app for everything these days, and that includes some essential resources for travelers. The best part? Apps are the perfect travel companion since they don’t take up room in your suitcase or carry on! I’ve rounded up my 15 favorite travel apps below (including two new-to-me resources I plan to test on our next trip). Any other apps you can’t travel without? Whenever and wherever you’re traveling – from a business trip to a quick escape for Memorial Day weekend to a three-week international adventure – don’t leave home without adding these travel apps to your smart phone!
Before You Go
TripIt– I confess to many years of traveling with a folder of printed air, hotel and car confirmations, as well as typed itineraries and activity lists. TripIt is a great tool for business travelers like my husband, who need to collect reservations in one place for reference on the go. It’s also perfect for the organized vacation traveler, who wants to corral multiple flights, hotel confirmations, and other details into one easy-to-read summary instead of lugging around hard-copy print outs. Because that is so old school…
Packing (+TO DO!) – I’m a chronic list maker. This app lets you create lists of what to pack for different trips and even set reminders (don’t forget the phone charger, remember our passports) and store them right on your phone. You can also edit, import, and export your packing lists from Excel if that’s your thing. I can’t wait to try this app out!
SeatGuru – Does your window seat really have a window? Will there be in-flight Wi-Fi? Is your seat located by the bathroom? Enter your flight number and SeatGuru shows you the best seats on the plane and other flight details.
Kayak – Like the online version, Kayak’s mobile app is a one-stop shop for air, hotel, and car reservations. Look and book, straight from your phone.
TripAdvisor – The mobile version won’t let you down. Get ratings, reviews and recommendations on hotels, restaurants, and points of interest. You can also book a restaurant reservation using the app’s partnership with OpenTable (see below).
TripAdvisor City Guides – Free city guides with restaurants, attractions, hotels, and reviews stored in the app offline, so you’ll have zero data-roaming charges. It’s a nice alternative to the TripAdvisor app if you don’t want to go online.
While Traveling
GateGuru – Have a layover and all you see is a McDonalds when you could really go for Starbucks? GateGuru plots out all the airport restaurants and businesses on a terminal map, so you can easily see what’s available wherever you’ve landed.
OpenTable – We love the ease of making restaurant reservations via OpenTable and use it even when we’re not traveling. Search for restaurants by location or name, filter by type of food or price, then reserve yourself a table.
Talkatone – Unlimited free calls and texts to anyone in the world over Wi-Fi or 3G? Yes, please! Even when overseas, you can call and text US numbers for free. And it’s easier than Skype, since the person you’re calling doesn’t have to install anything.
Google Translate – Type a phrase into the word box or use the speaking option to say the phrase. Google will do the translation work for you.
GlobeTipping – A tip for a tuk-tuk ride in Bangkok vs. a cab ride in New York City? Vastly different. GlobeTipping provides tipping guidelines for more than 200 countries, so you’re never left scratching your head or worrying about offending the locals again.
XE Currency – I always check this website for currency information when planning a trip, but the app version puts the currency converter in your hands so you don’t have to do math in your head when on the go.
Spotify – I create playlists before we depart and set them to be available even when I’m offline (we do pay a $10/month subscription fee). I love, love having my favorite music at my fingertips for long plane rides, relaxed beach time, or even impromptu dance parties in our hotel room.
Instagram – If you don’t want to mess with a camera, but still want to share your adventures, Instagram is obviously the way to go. I always do a combination of camera and iPhone photography. In some situations an iPhone is just more appropriate to whip out to get a quick shot, plus I love being able to share instant snaps of the places we’re experiencing with friends, family, and followers back home.
Postagram – I quit sending cheesy tourist postcards a long time ago, but I still love the concept and enjoy receiving them from friends. The Postagram app lets you snap your own postcard, then prints and sends it for you through the mail for just 99 cents. So cool! Oh, and your first 5 postcards are free. Definitely on my list to try.
Summer is undeniably my favorite entertaining season. I mean, what’s better than a laid-back get together with friends on the patio, soaking in a little sunshine and savoring flavors fresh off the grill? For my latest edition of Dressed to Entertain, I’m taking you to my backyard for a Mediterranean al fresco dinner and showing you exactly what I’d wear. My favorite navy and white color combination fit the bill perfectly, and allowed me to leverage several of my go-to wardrobe staples for summer. Hop on over to Channeling Contessa to read the full post!
You are currently browsing the Perpetually Chic blog archives for May, 2013.